Contents
User Journey for EasyPass (Passkeys)

Overview
EasyPass is a passwordless authentication method using passkeys for secure and seamless login. It leverages biometric authentication (Face ID, Touch ID, Windows Hello) and stores credentials securely on a user’s device. This eliminates the need for traditional passwords or OTP-based authentication.
This feature is now available to use as a OneAdvanced Platform Identity service and provides users with an alternative to traditional username/password or OTP login methods.
Key Benefits
- Frictionless Login – One-tap access using Face ID or fingerprint.
- Enhanced Security – Protection against phishing and credential stuffing
- Platform Support – Works on major browsers, operating systems and devices (Chrome, Edge, Safari, Windows, iOS, macOS, Android).
Enabling EasyPass (Passkey)
EasyPass can be enabled at an organisation level or per user.
Organisation-Level Enablement
Admins can enable EasyPass by toggling the ‘EasyPass (Passkey)’ setting in the Organisation Module, when enabled
- All new users created (via UI, import, API) will have EasyPass set up by default.

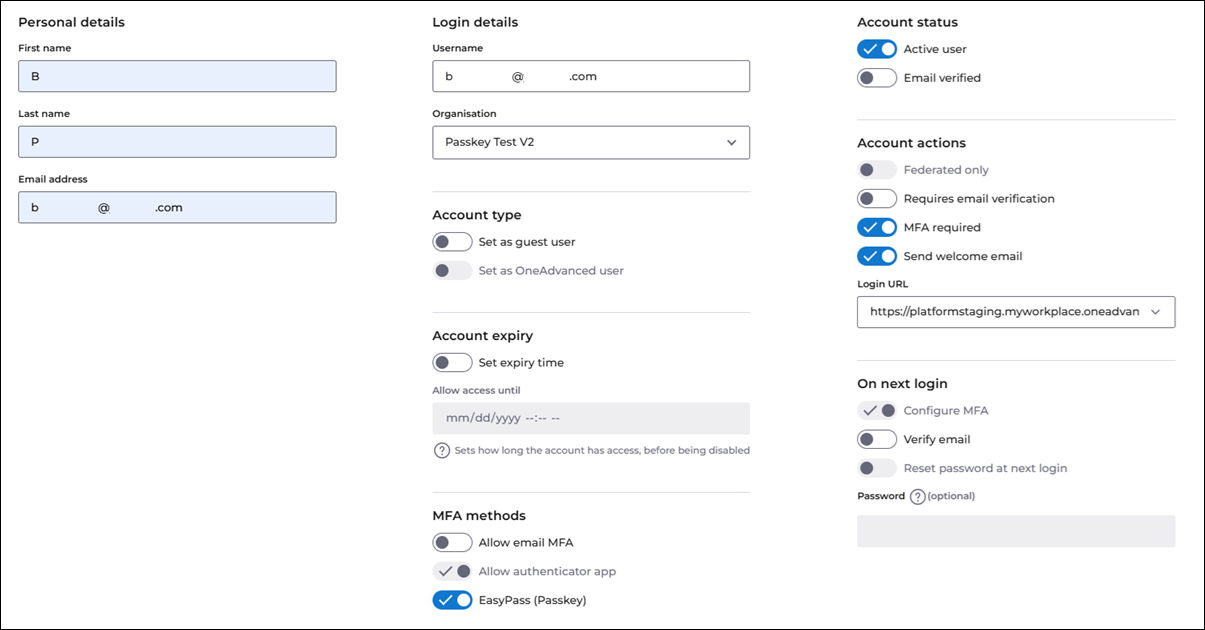
Manual Enablement for Individual Users
If not enabled organisation-wide, admins can enable EasyPass per user via the User Manager UI.
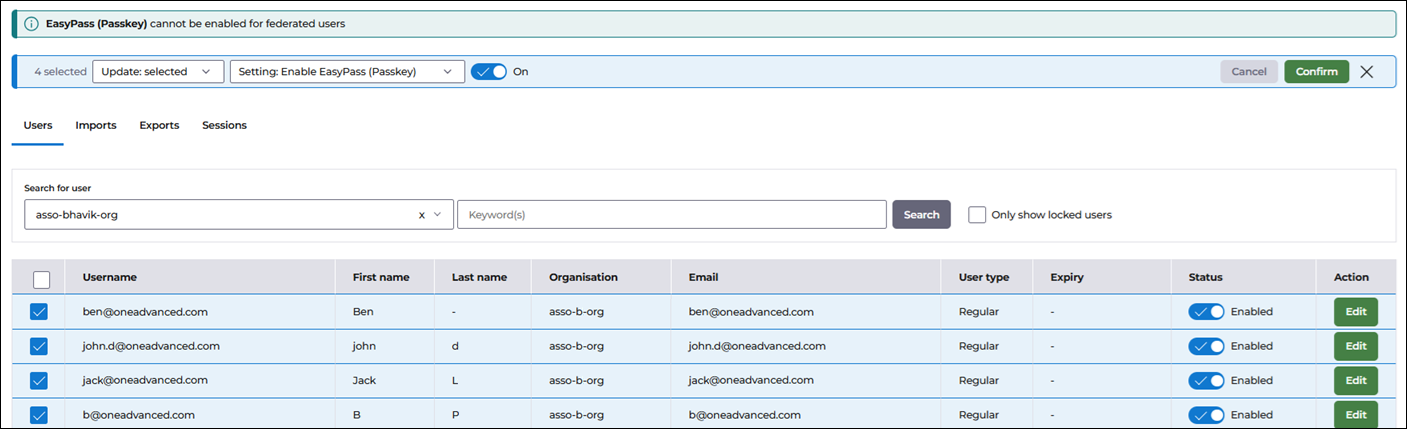
Bulk Enabling Users with EasyPass (Passkey)
Admins can enable EasyPass for multiple users simultaneously using Bulk Edit Functionality. This is useful when onboarding existing users without manually editing each account.
User Import – Pre-Enabling EasyPass for New Users
Admins can also import a CSV file or use API calls to create new users with EasyPass enabled by default.
User account setup with EasyPass (Passkey)
- User receives welcome email and Creates Password.
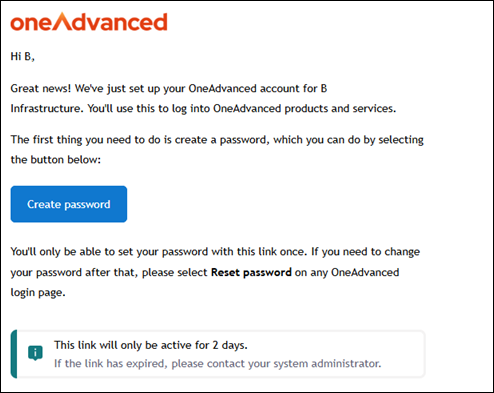
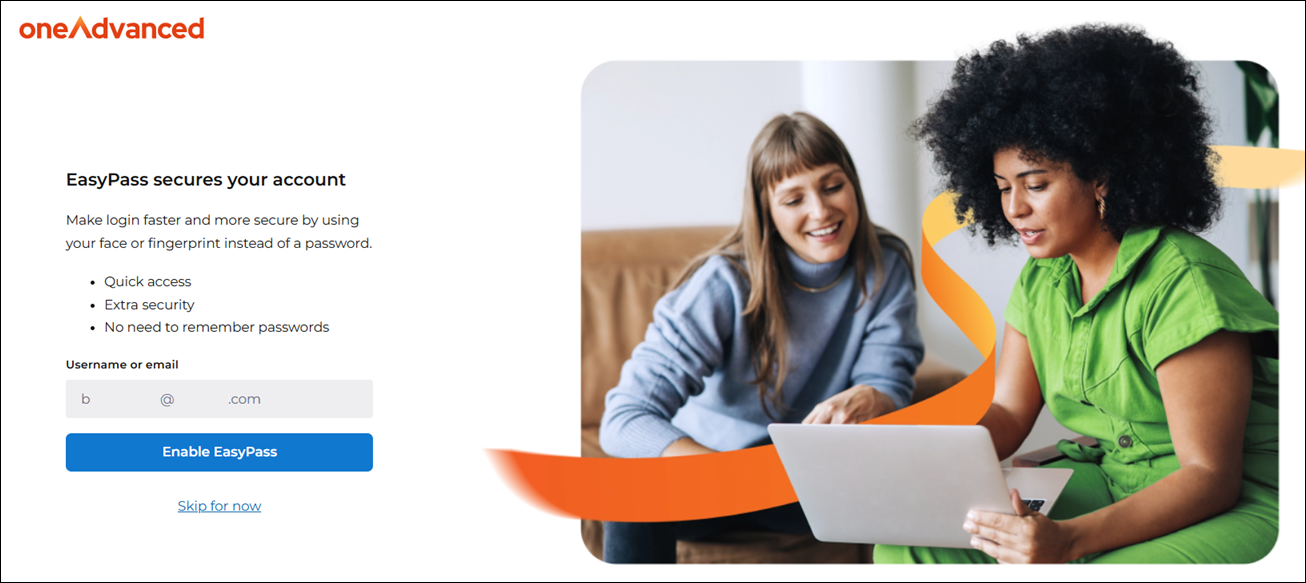
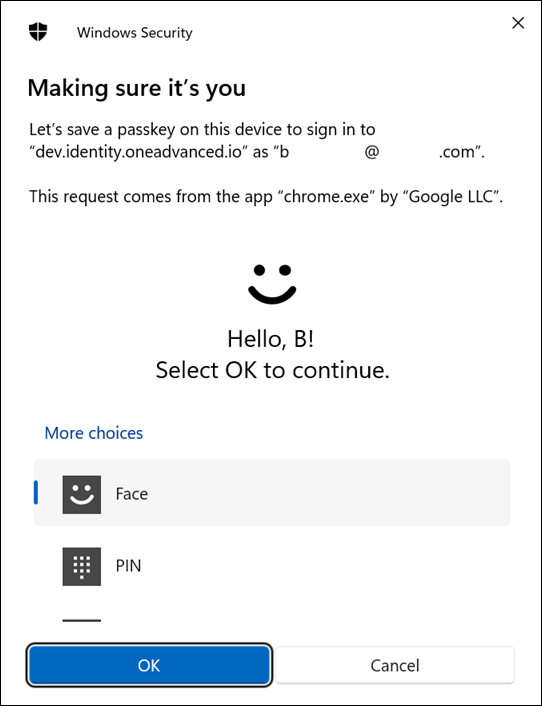
- After password setup, user is prompted to Enable EasyPass.
- User selects a biometric authentication method (Face ID, fingerprint, PIN) using Windows Hello.
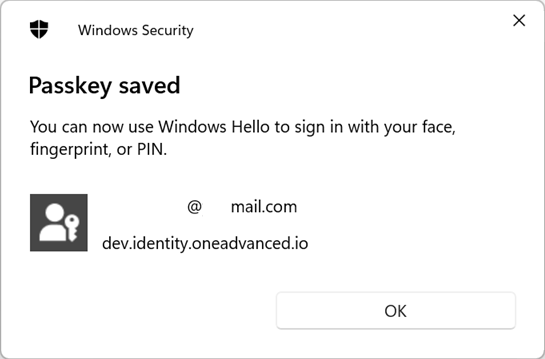
- A confirmation appears that the passkey has been saved.
- User gets a confirmation message about account setup and if login URL is added to organisation, user will get redirected to product login screen in 5 seconds.

Subsequent logging in with EasyPass
After registration, login becomes simple:
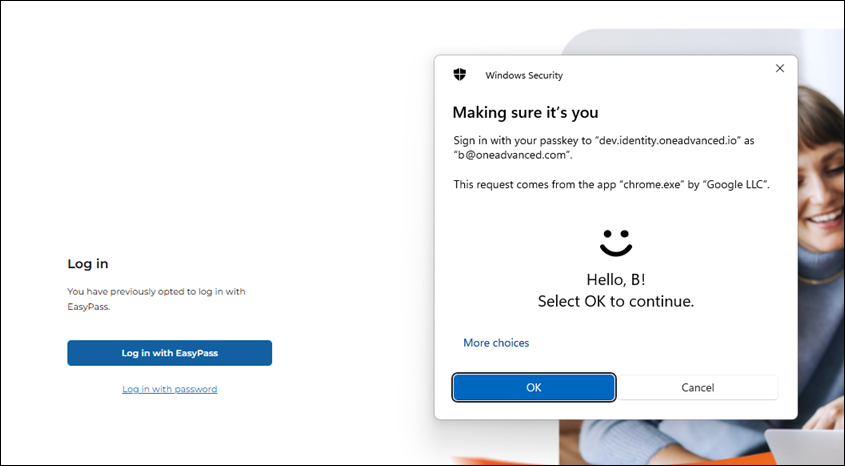
- User enters their username and selects their organisation (if applicable).
- Clicks ‘Log in with EasyPass’ → Authenticates using Face ID, fingerprint, or PIN.
- Successfully logs in without a password.

If the user has setup EasyPass on their mobile device, it can still be used to login to a desktop browser.
When the user is prompted to login via EasyPass, they can choose the option for their device, which generates a QR code that can be scanned via their iOS or Android mobile device.


Alternative Login Methods
If needed, users can opt for traditional authentication:
- Click ‘Login with Password’ →
- Enter credentials & MFA code →
- Gain access securely.
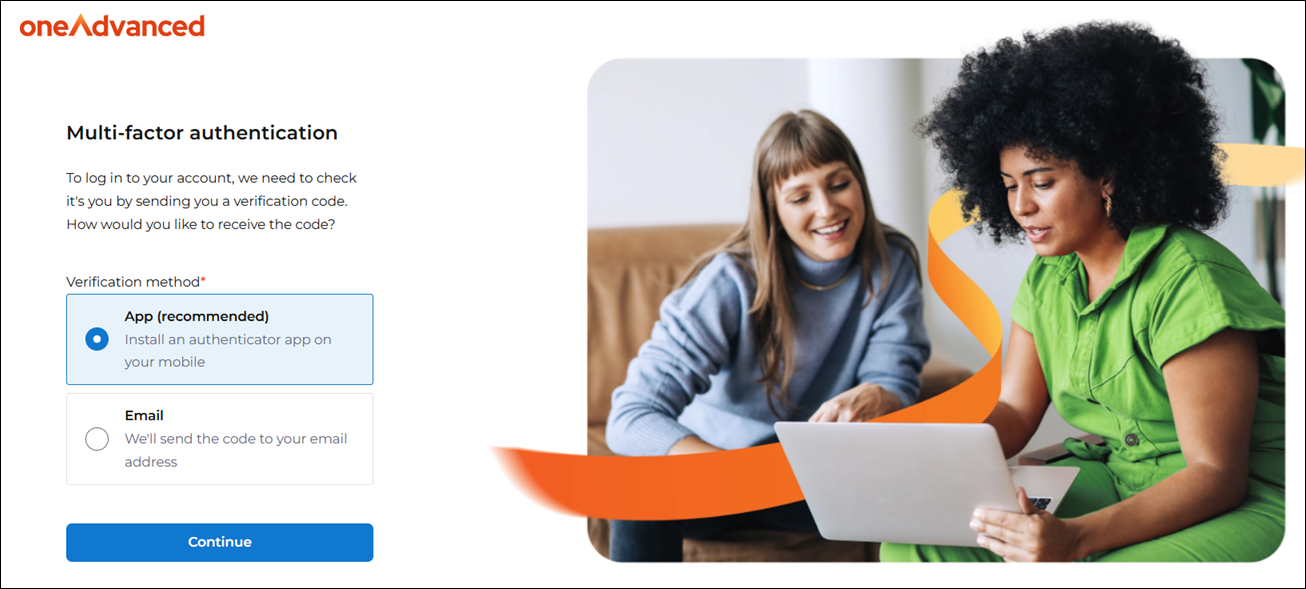
What would happen if I click 'Skip' during account setup?

If the user clicks ‘Skip for now’, they will be directed to use older methods of MFA i.e. they would need to set up Multi-Factor Authentication (MFA) via app or email.
What would happen If I select "Don’t Ask Again" option
If EasyPass is enabled for your account and you no longer want to be prompted every time you log in, you can select the Don’t Ask Again option on the EasyPass prompt screen.
- Once selected, you will no longer see the EasyPass setup prompt when signing in with Email MFA or App MFA.
- This gives you the flexibility to skip the setup prompt if you prefer not to enable EasyPass right away.
Managing EasyPass in Account Settings
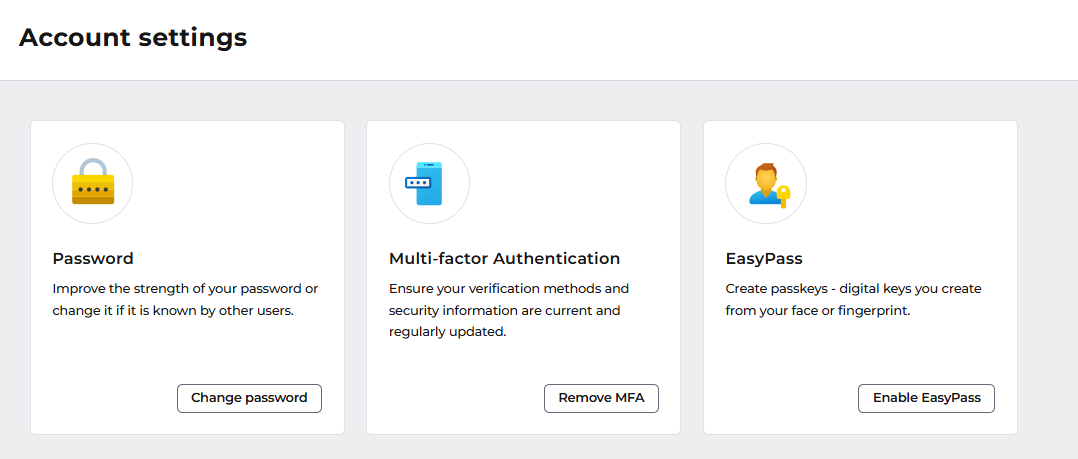
You can enable or remove EasyPass from your profile at any time:
- Go to your Account Settings.
- Find the option for Enable EasyPass.
- Choose to Enable or Remove EasyPass as desired.
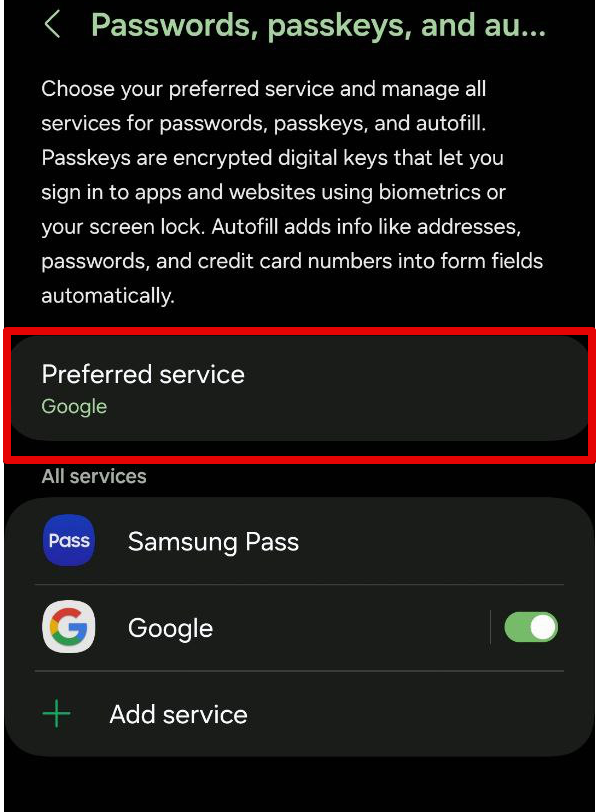
Incompatibility with Samsung Pass only on some Samsung devices
Solution: Change Preferred Service to Google
Setting Up Passkeys on Android
To enable and store passkeys on your Android device, follow these steps:
- Open the Settings app.
- Search for "passkeys" and select General Management from the results.
- Tap on Passwords, passkeys, and autofill.
- Enable your preferred Credential Manager or Passkey Manager under All services.
Ensure that all necessary services are activated before creating a new passkey. - When prompted during passkey creation, tap More options, then select Save another way to choose your preferred storage location.
ℹ️ Important Note
This change will not delete your data in Samsung Pass; it will only redirect passkey storage to Google to ensure compatibility with OneAdvanced.
If you continue to experience difficulties after following the steps above, please do not hesitate to contact your account manager. We look forward to supporting you.