Contents
Onboarding new users with welcome emails
Welcome emails notify your users when their account has been created. These emails include a secure link that allows users to set up their account, create a password, and configure Multi-Factor Authentication (MFA) for added security before logging in.
Sending a welcome email when creating a new user
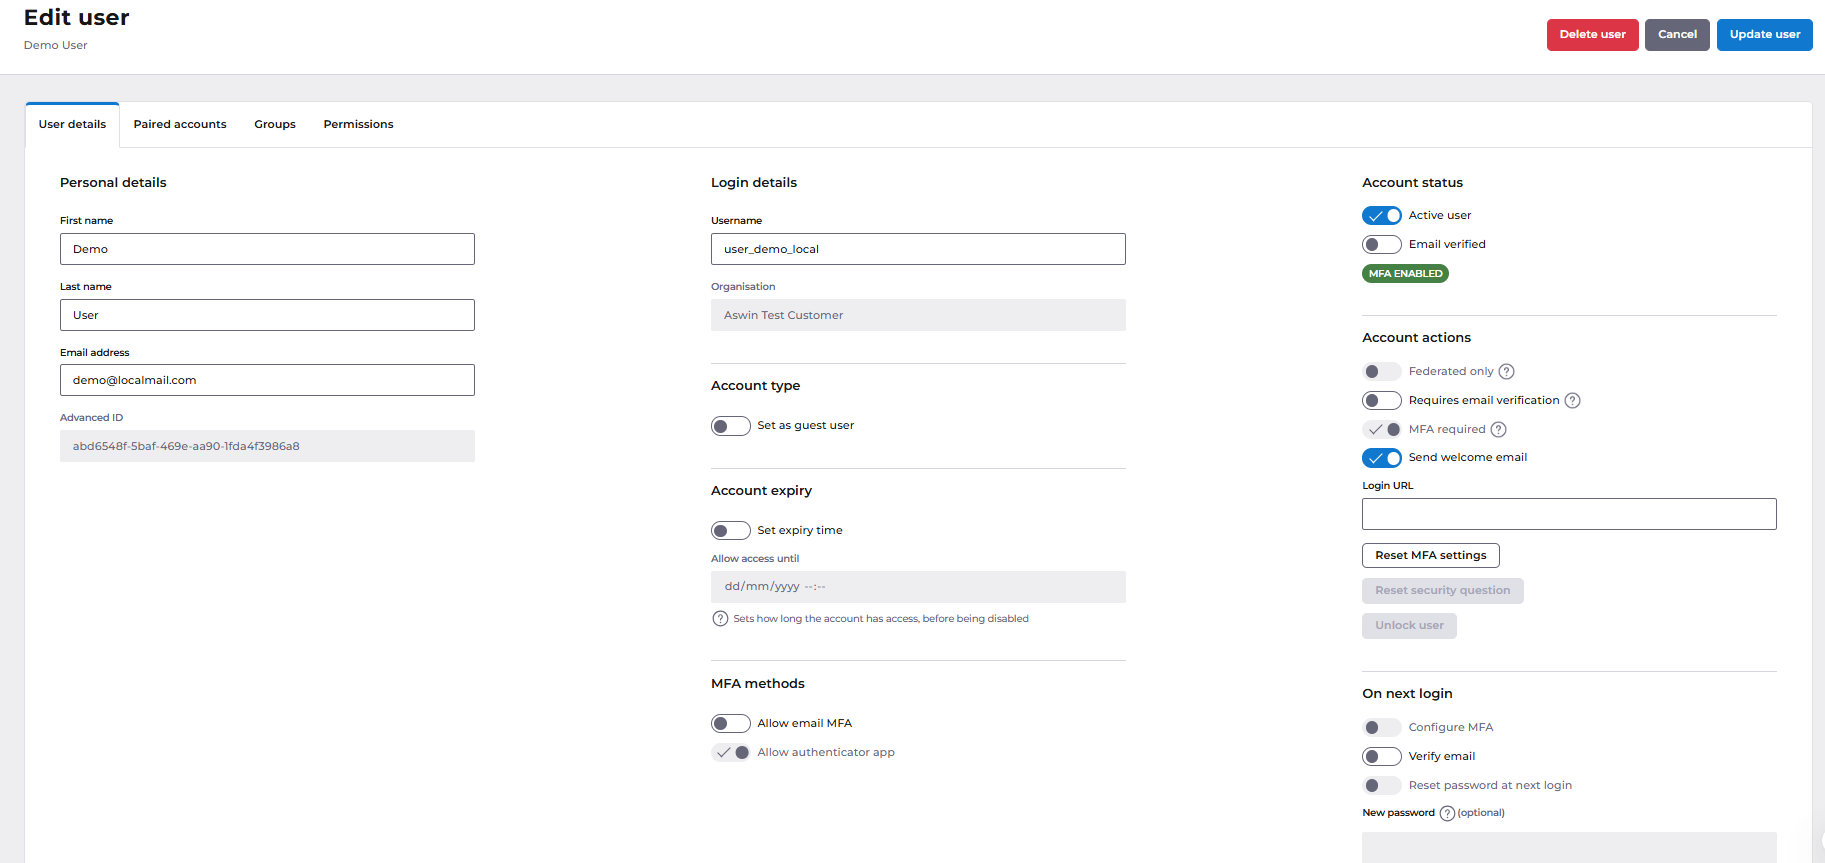
When creating a new user, you can now choose the Send welcome email option under Account actions.

Once the user account is created, if the Send welcome email field is enabled, the system will send a welcome email to the user’s registered email address.
Login URLs can be specified for each user separately using this field where the user will be redirected once their account setup is successfully completed.”
Alternatively, Login URLs can be updated for multiple users by using the user import template.
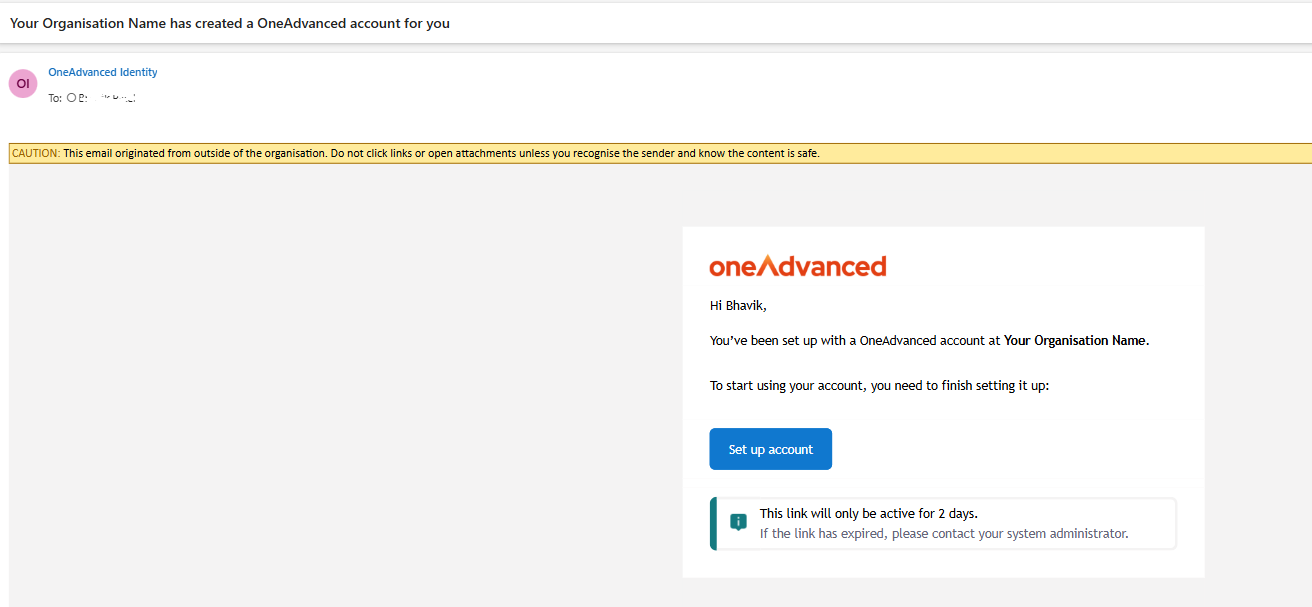
Example of welcome email;
Subject line includes - <Your Org Friendly name> has created a OneAdvanced account for you
Welcome emails cannot be enabled for Federated only users or for users who have already set a password for their account.
Sending a welcome email to an existing user
You may want to create a user and delay sending the welcome email until a later date. You can do this by going to Edit the user, then enabling Send welcome email. The email will send when you hit Update user.
You can use this option to resend welcome emails if a user hasn't set up a password before the link expires.
Sending welcome emails to multiple users
When importing users into the system, you can specify whether to send a welcome email by setting the cell value to 'Y' for the Send welcome email column. If left blank, the system will interpret it as 'N' and will not send the email.
You can also send welcome emails through the bulk edit functionality. This is helpful if you want to create the users first and send the welcome emails at a later date.

Welcome email journey
In the welcome email, users will be asked to set up account.
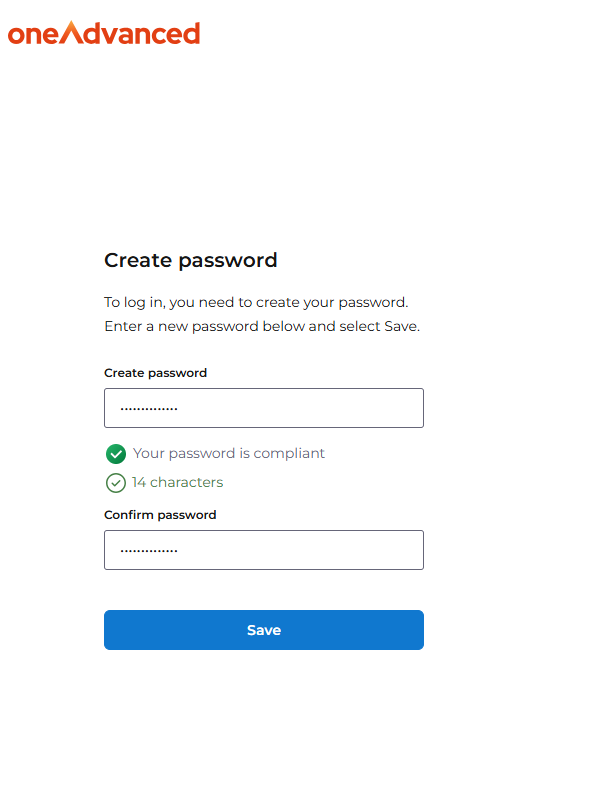
Clicking on Set up account, it will direct the user to a secure page where they can create their password.
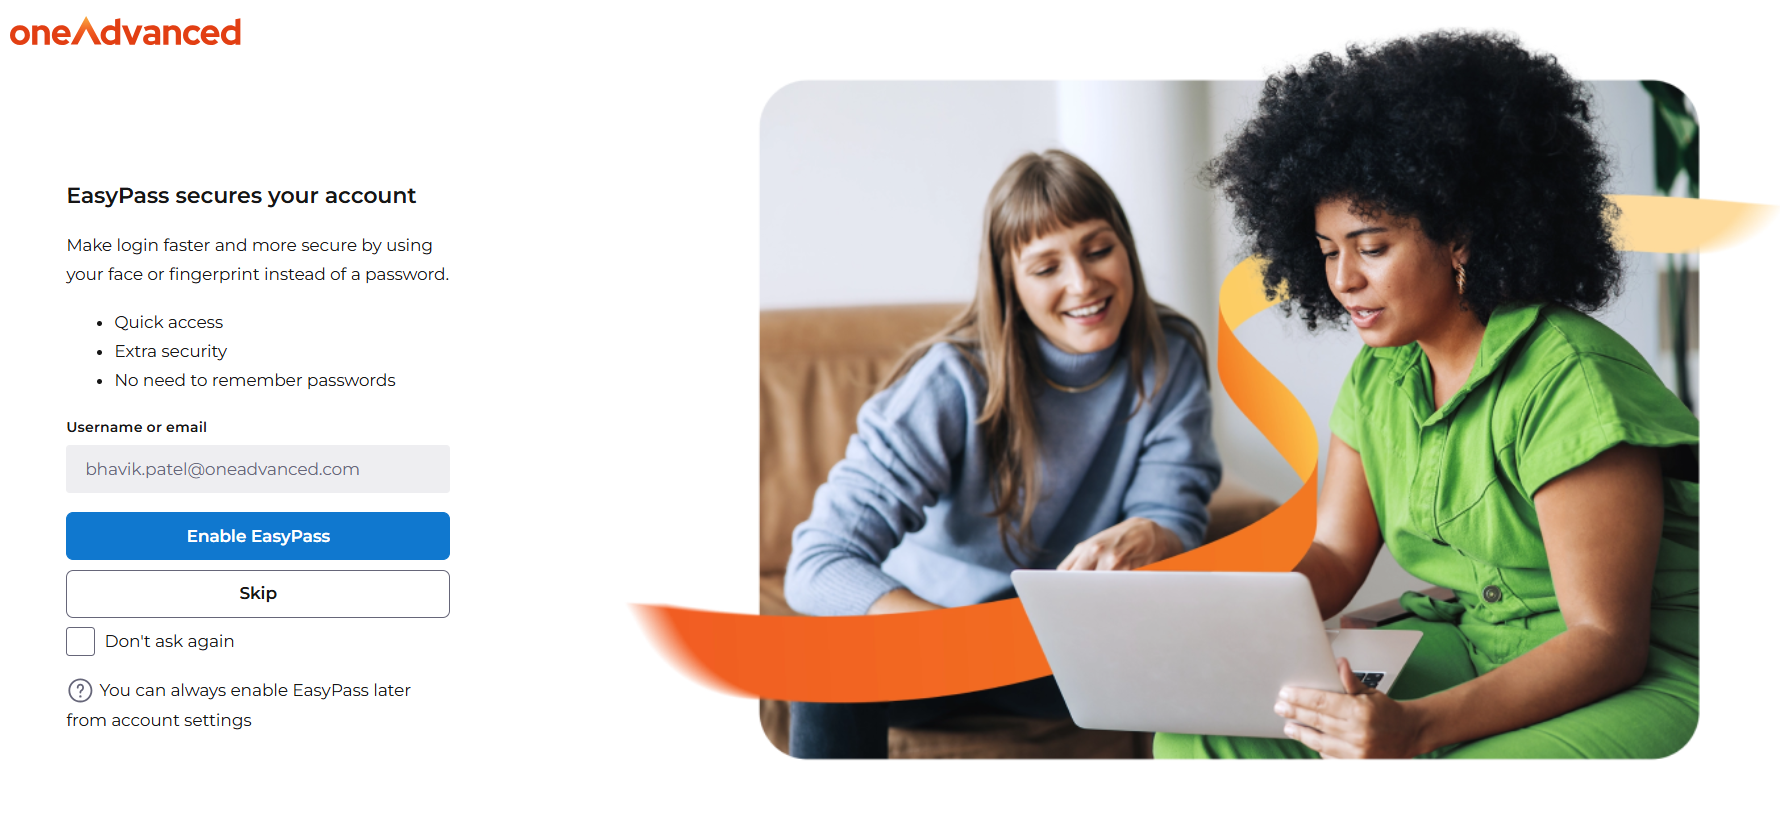
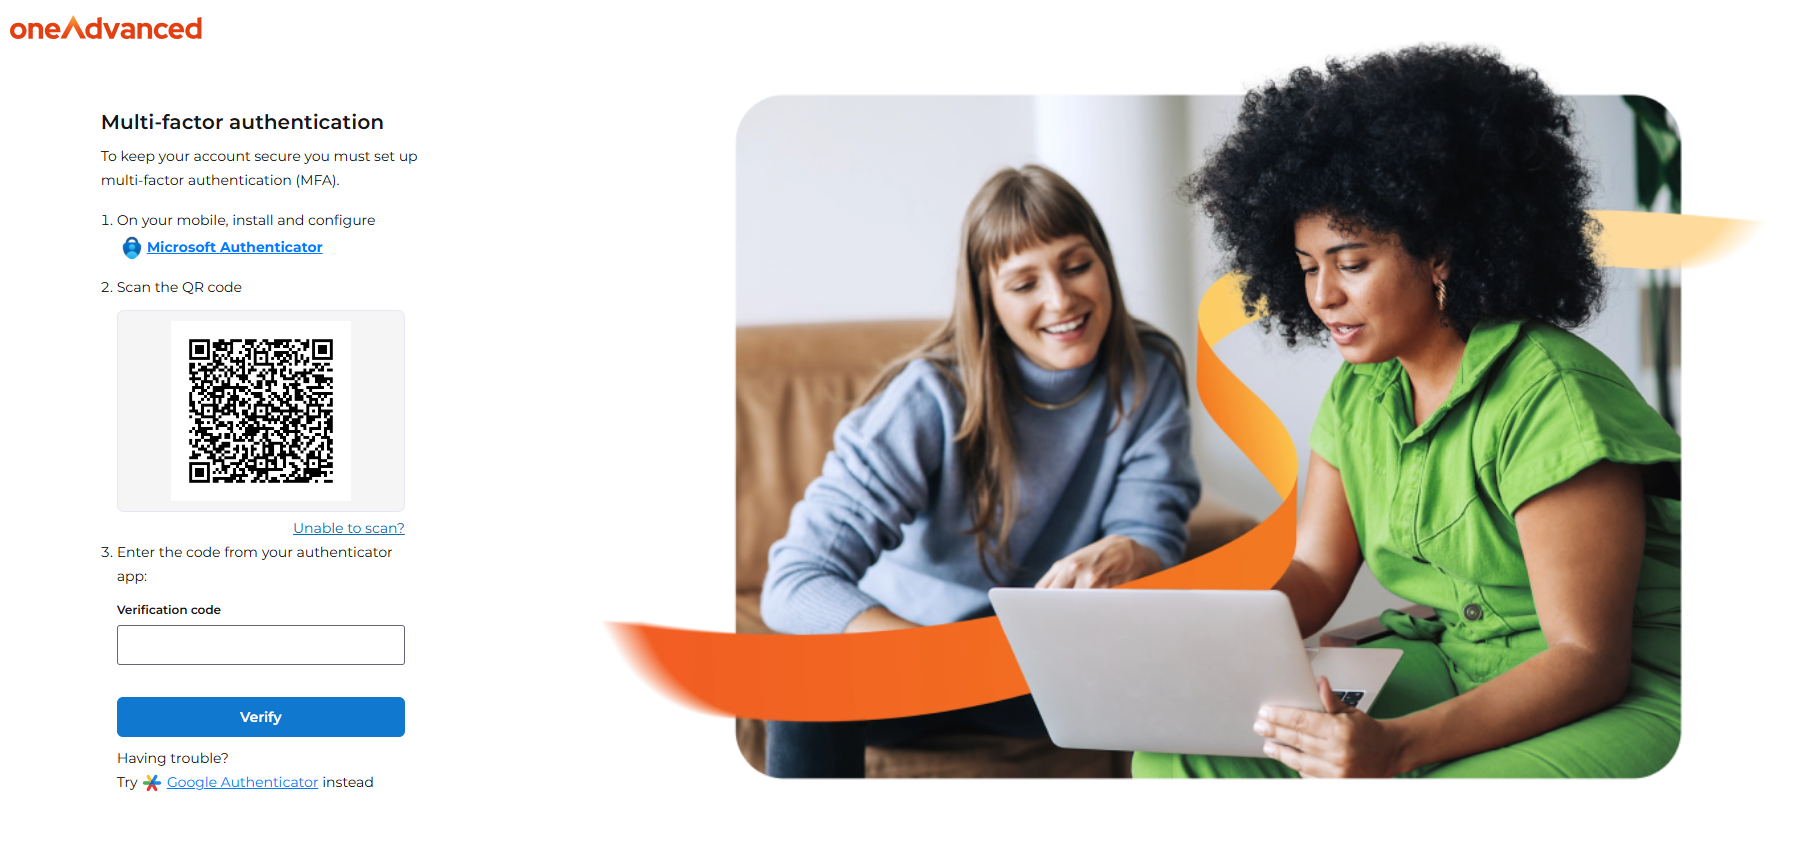
After successfully setting their password, the user get redirected to select MFA method for adding security to the account profile.'
If EasyPass is enabled for the user account by the admin, the user will then be redirected to the Enable EasyPass screen.
If EasyPass is not enabled:
- The user will be redirected to select an MFA method if both Email MFA and App MFA are enabled.
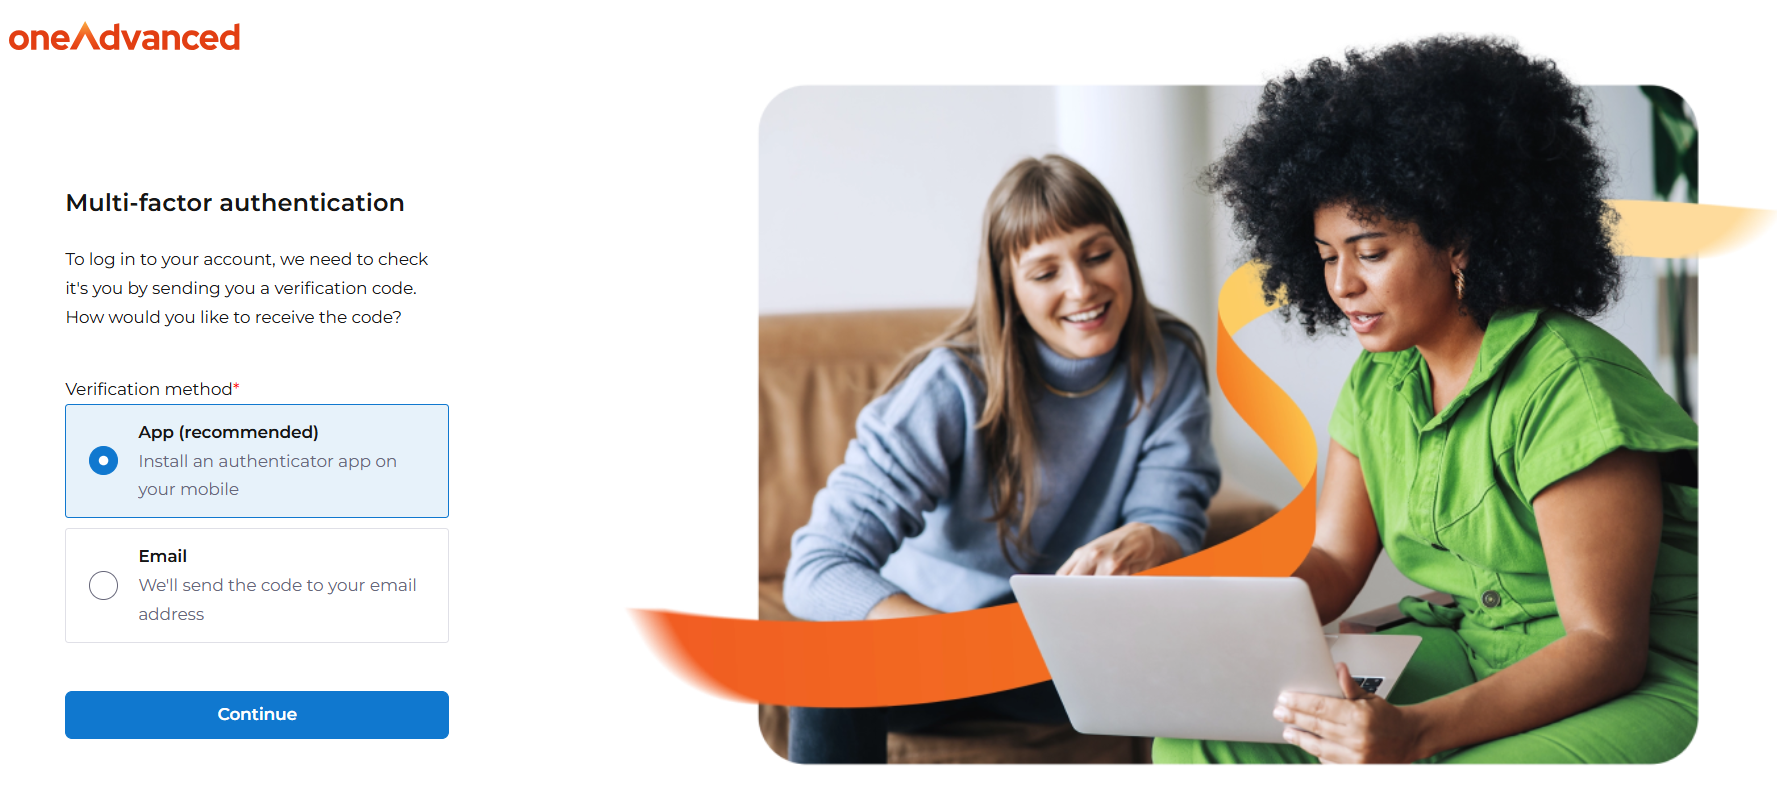
- The user will be redirected directly to the App MFA screen if only App MFA is enabled in the account.
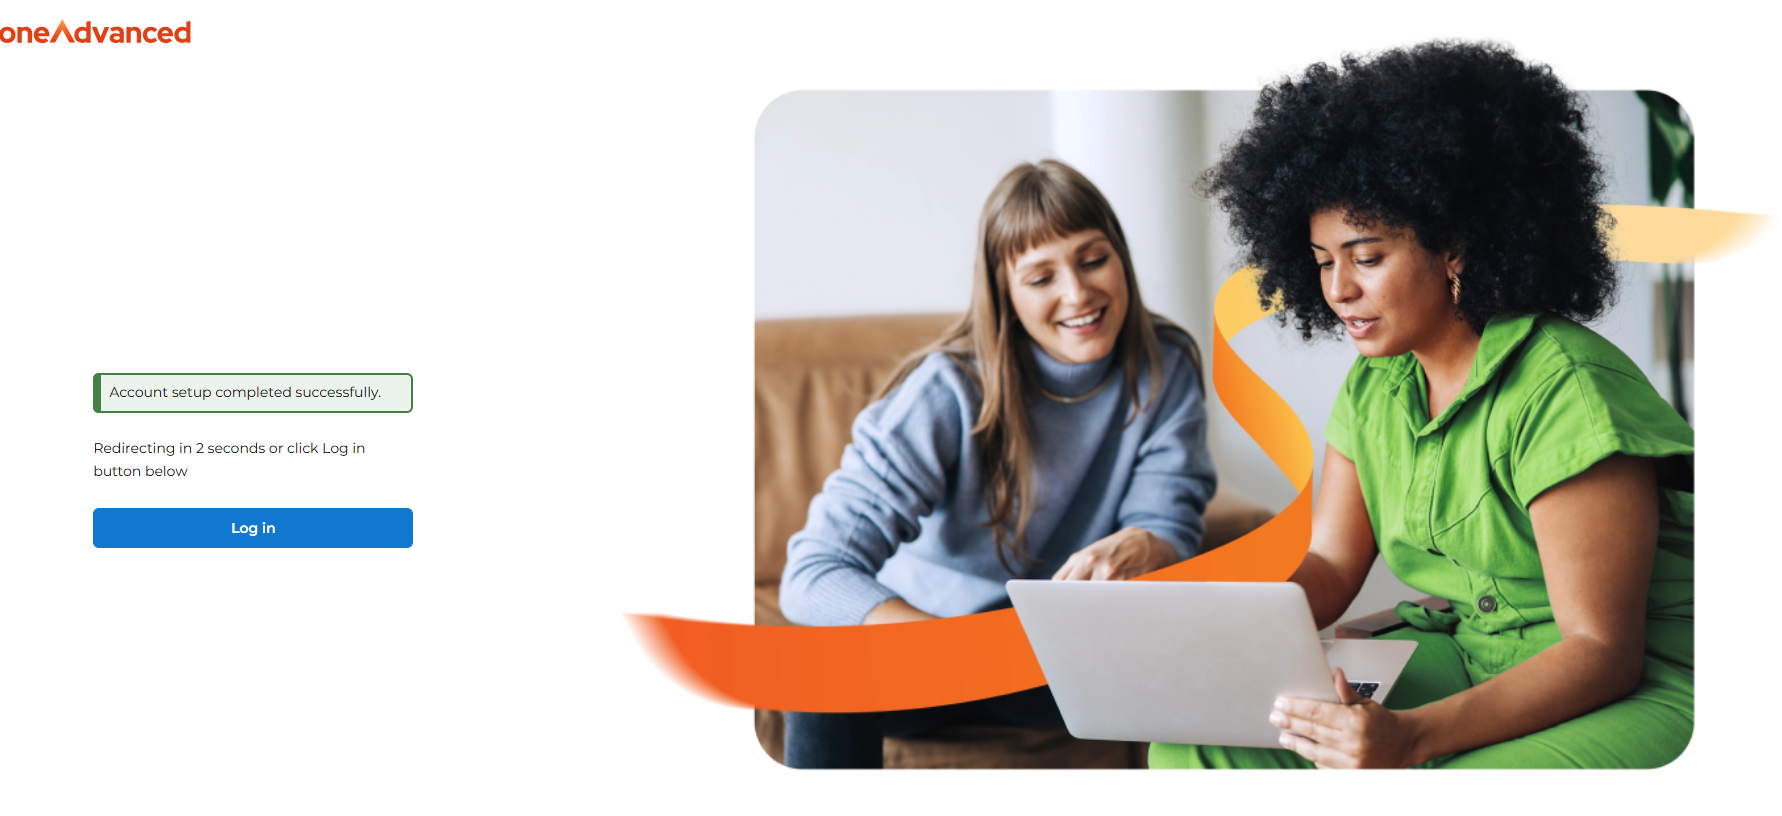
Once user completes MFA, user is notified with message 'Your account setup completed successfully'
If a login URL was provided during account creation, a 'Log in' button will also appear. Clicking this button will redirect the user to the login screen, where they can sign in using their newly created password and selecting a multi-factor authentication (MFA) selected on account setup.
User will also receive an email notification to say their password has been updated.