Single Sign-on (OneAdvanced SSO, previously known as Advanced SSO or ASSO) simplifies access management across multiple applications by allowing you to use a single set of credentials for secure authentication.
Multi-factor authentication (MFA) enhances this process by requiring more than just a password to access software applications. This additional layer of security, which may include a code from an authenticator app or a message to your phone, significantly increases protection and helps prevent unauthorised access, particularly if a password is compromised. You're likely familiar with MFA from everyday activities such as online banking, making online purchases, or using various apps.
You can read more about the benefits of single sign-on, and the importance of MFA.
Here are the screens that you will see when logging into OneAdvanced software that uses Identity and you choose to use email for multi-factor authentication.
Logging in for the first time with Identity and MFA
If you're logging in to an OneAdvanced application for the first time, or if your account has been migrated to use Identity, you will get these steps on your first login.
If you have logged in using Identity before but are setting up MFA for the first time, you will not need to set a password as you will already have a password for your account. You can skip ahead to Setting up MFA. This is relevant for existing users of HR or Financials.
Setting your password
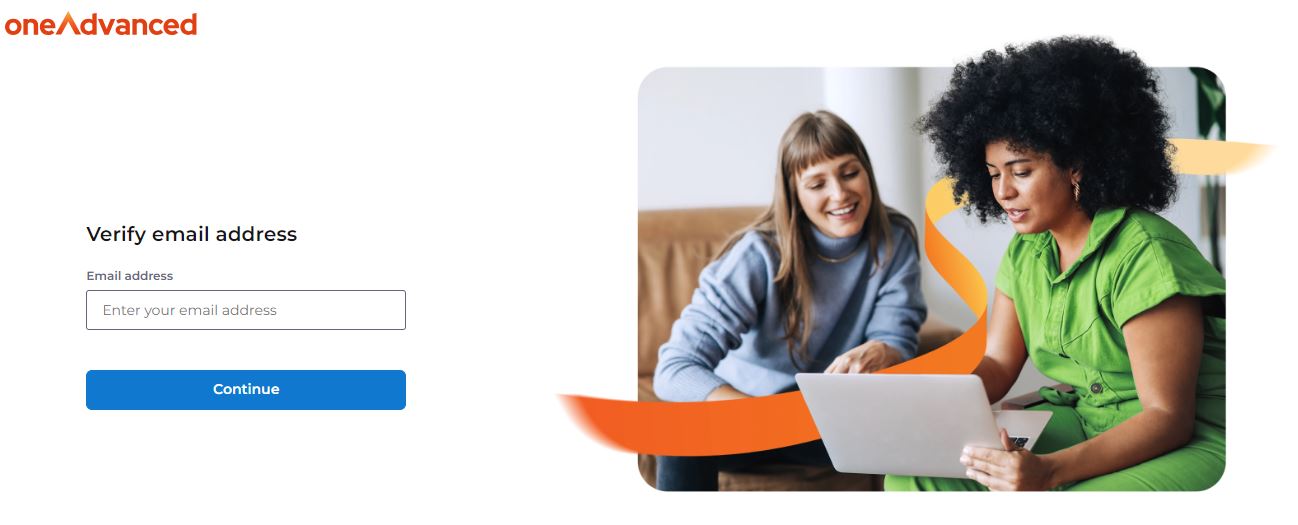
When first logging on, you will be asked to enter your email address.
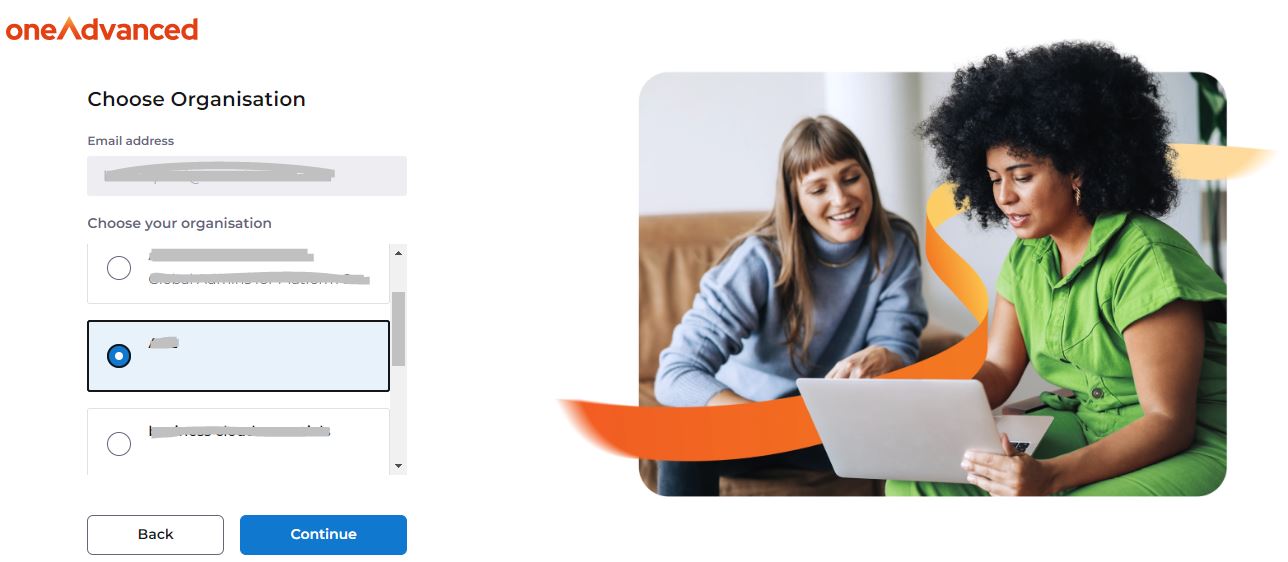
If you have access to more than one organisation, you will see this screen to select an organisation. If you only have one organisation, you will not see this screen and will skip straight to screen 3.
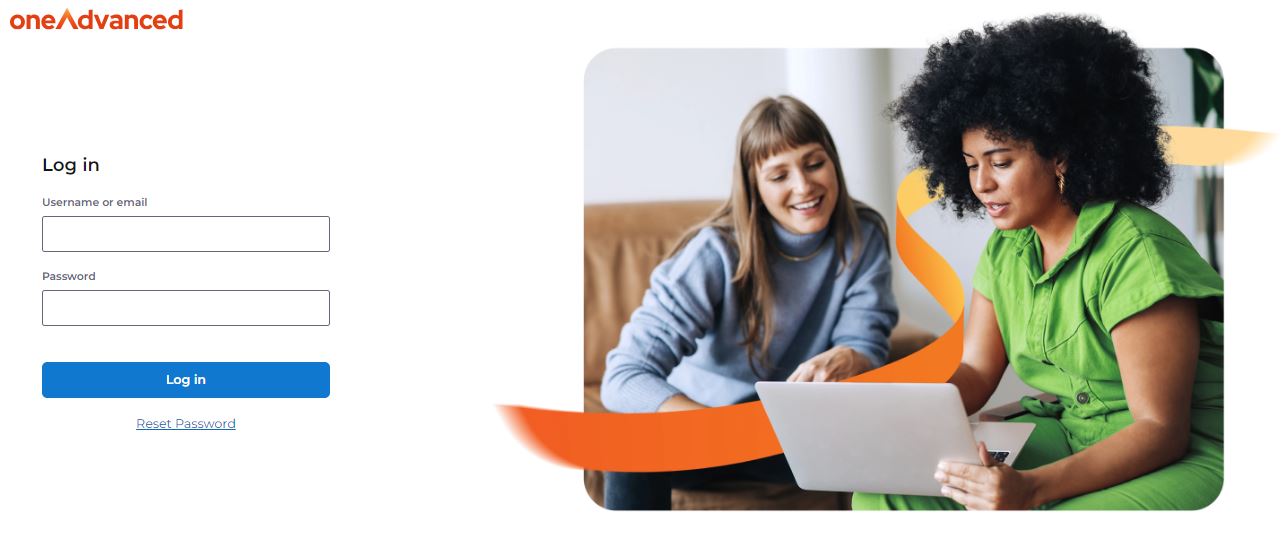
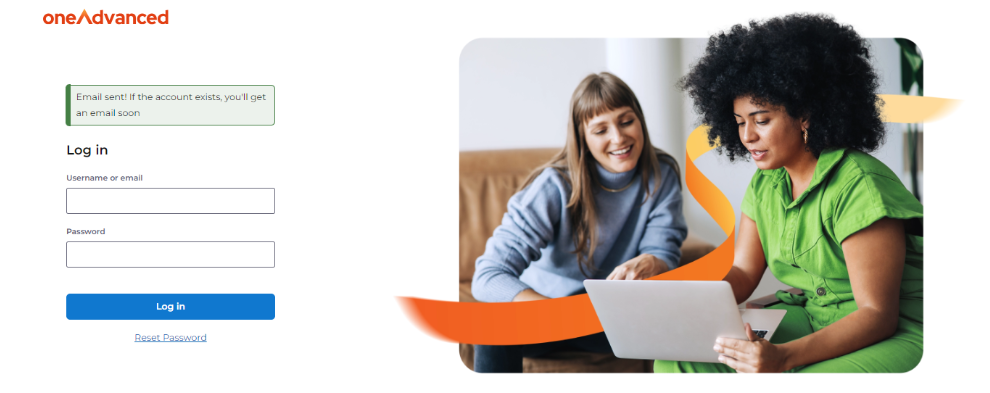
Select 'Reset password?' under the log in button in order to set a password for your account.
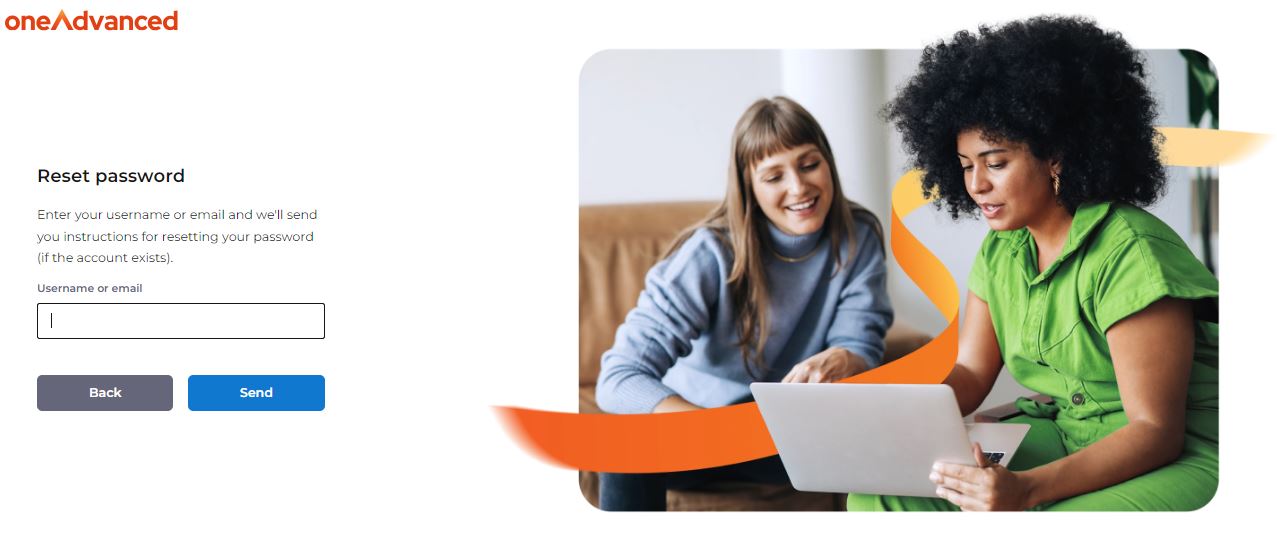
You will need to enter your username or email address.
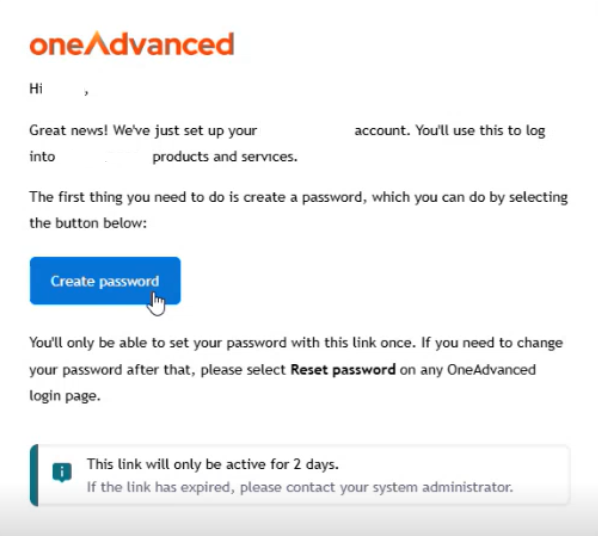
An email will be sent to your email address with a link to set your password.You will receive an email that looks like this, but will include your organisation's name.
Setting up MFA
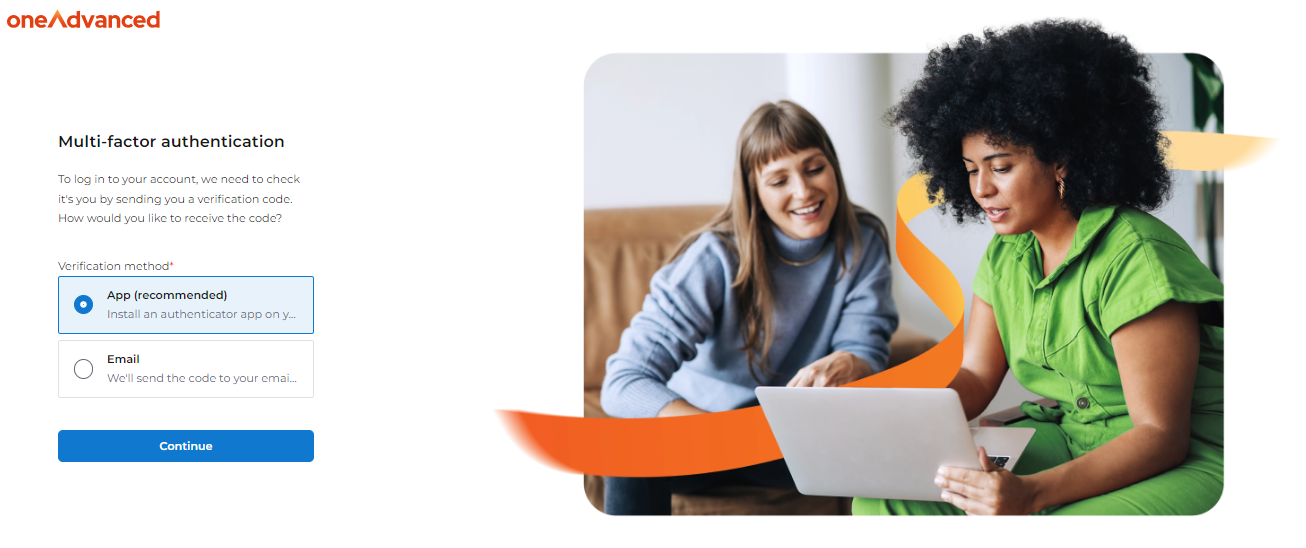
Once you click on Change Password, you will be asked to set up Multi-Factor Authentication (MFA) using either an authenticator app on your phone or the email address on your account. We recommend using an authenticator app as this is the more secure method as somebody would have to get your physical device and know your password in order to get access to your account. See the steps here for setting up an authenticator app.If you choose email as your authentication method, you must make sure that you are using a different password for your email account and your Advanced account. You should also use multi-factor authentication for your email account if possible.
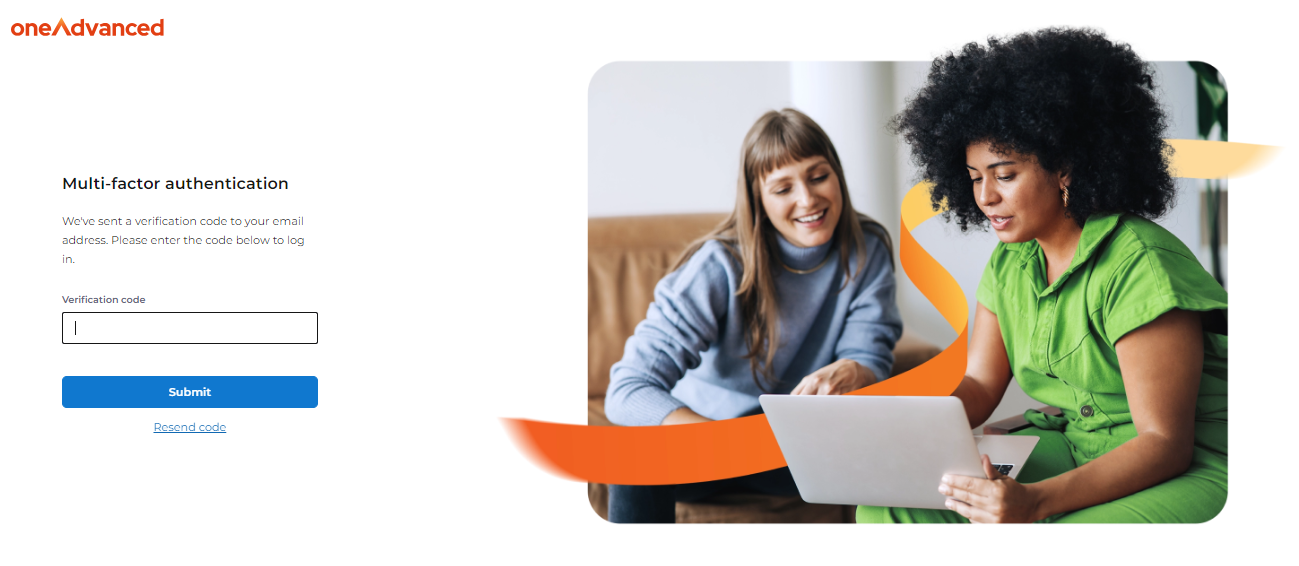
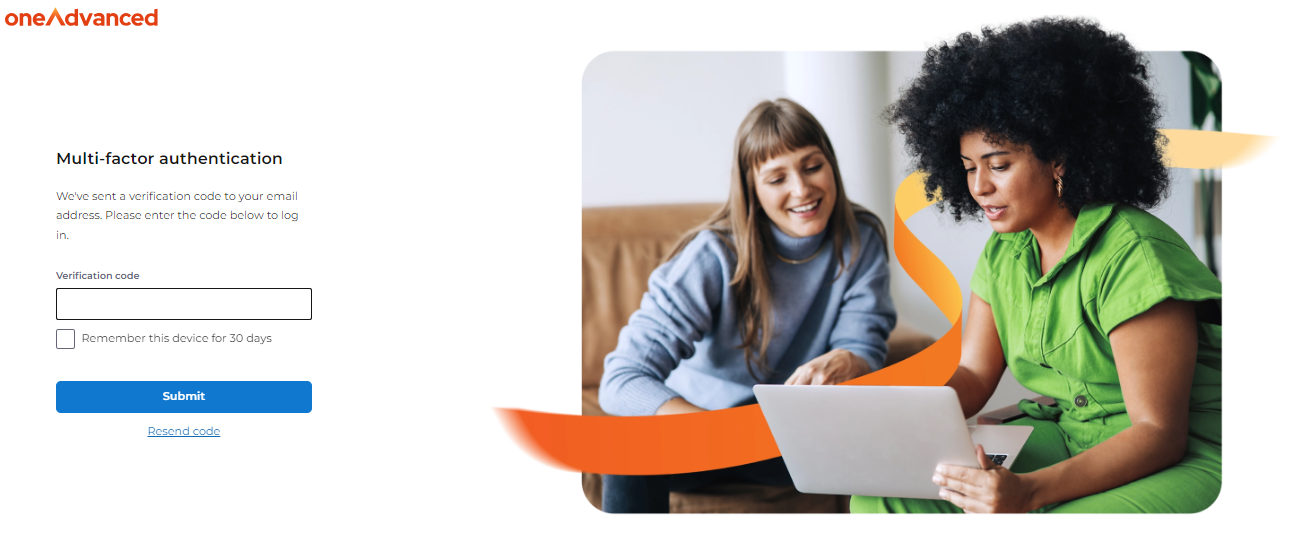
After selecting email, you will be asked for a verification code. Check your email connected to your account for an email containing the code. There is an option to resend the code if needed. If you can't see an email, check your junk/spam folder.
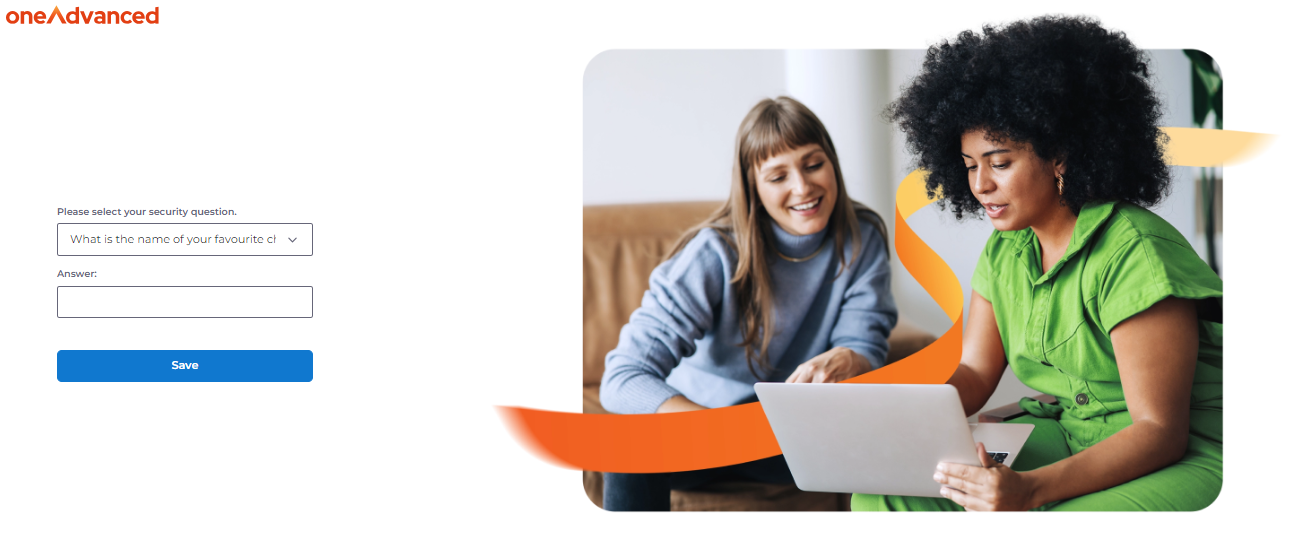
Once you entered the verification code, it will ask you to select your security question and answer.
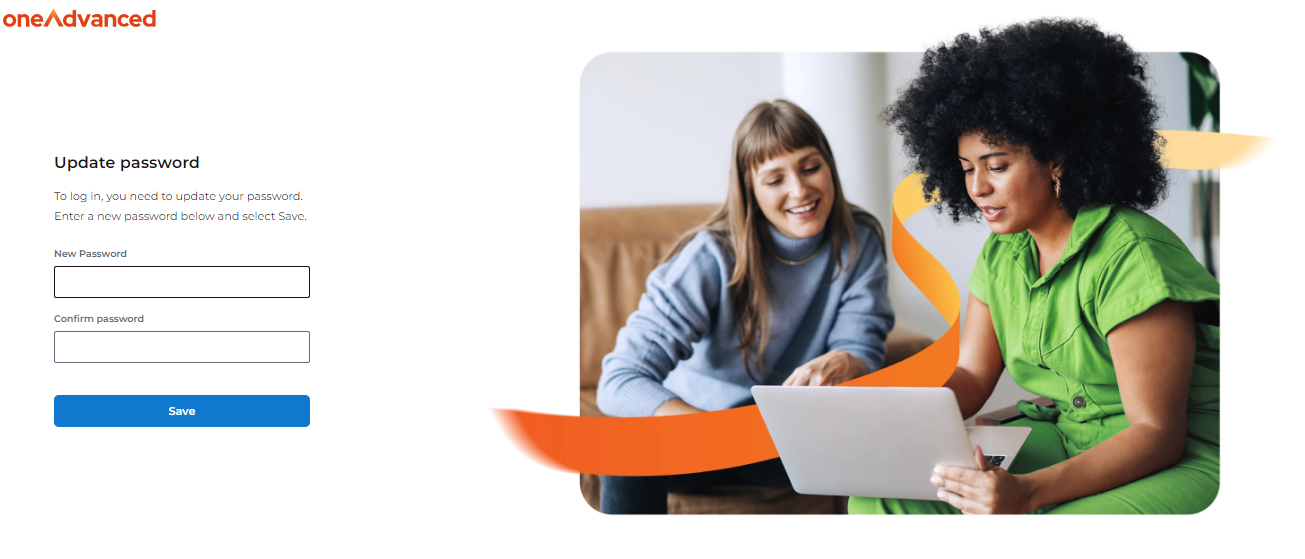
Once the security question and answer is saved, it will need new password and you will be logged into the software
Subsequent logins
When you login in the future, you will only have two steps.
You will be asked for your username or email address and password.
You will be asked to enter the verification code from the email you receive.
That's it! If you're unsure of anything or have any problems logging in, you can check our FAQs or contact your system administrator for help.