Creating users in Identity is a really quick and easy process. This can either be done individually or using the User Import feature to create multiple users at once.
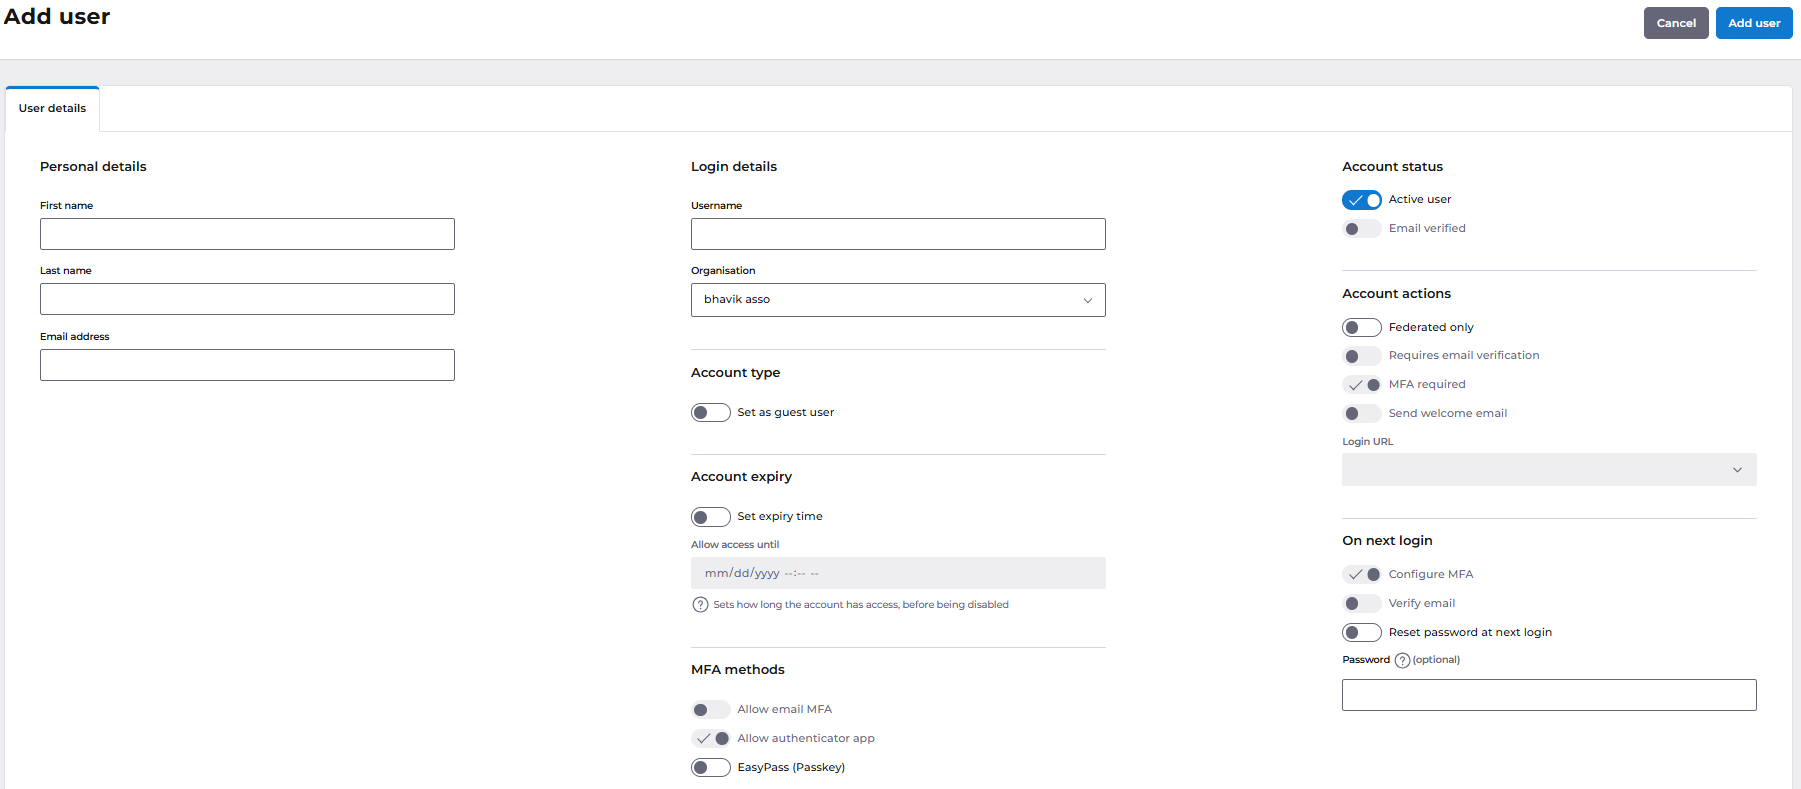
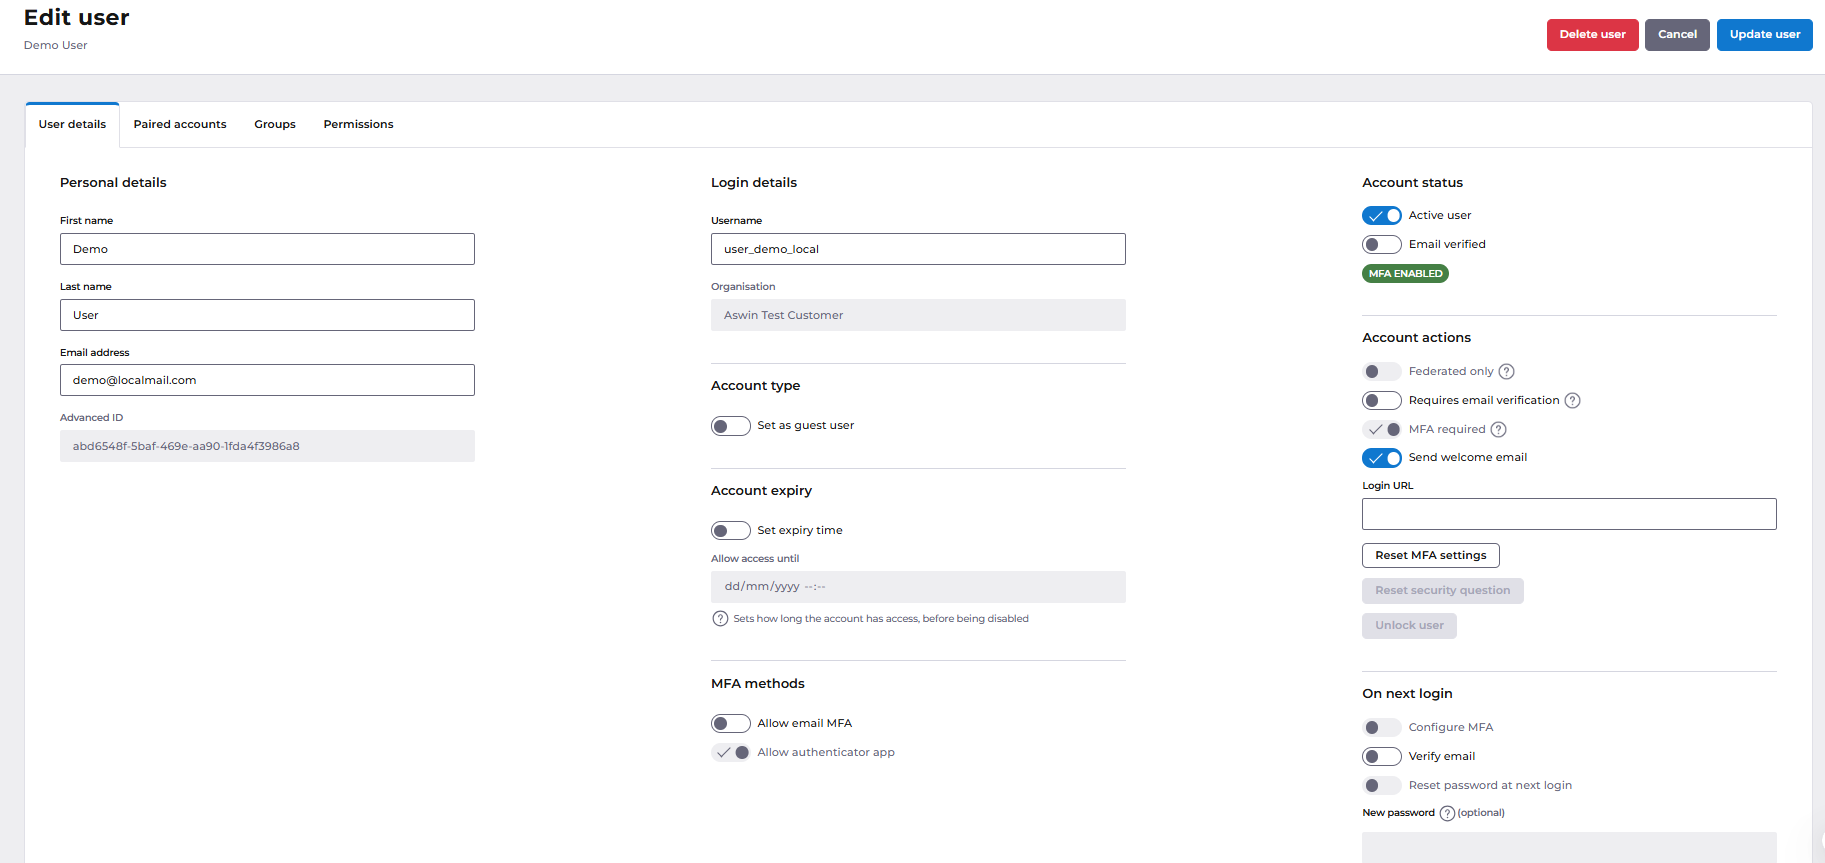
Personal details
Users need to have first name, last name (optional) and email address.
Login details
The username field will automatically pre-populate with the user's email address. You can change this to a different username if you prefer.
You can choose which organisation to assign the user to if you have more than one organisation.
Account type
You can set user accounts to expire, and set up guest user accounts.
If a user has been set with an expiry time, their account will be disabled on the expiry date and time.
Guest users must have an expiry of no longer than 30 days in the future. They must require email verification, and email verification can't be manually changed.
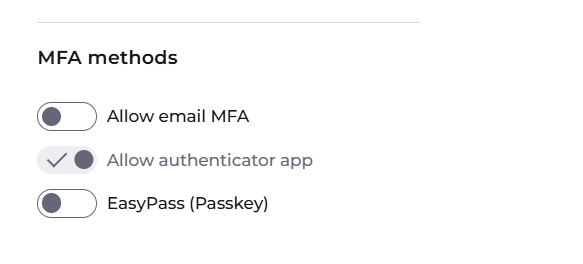
MFA methods
You can enhance account security by enabling one or more multi-factor authentication (MFA) methods for users:
Email MFA – Sends a one-time verification code to the user’s registered email address for login verification.
Authenticator App (Default) – Uses an authenticator app (such as Google Authenticator or Microsoft Authenticator) to generate time-based one-time codes for secure access.
EasyPass (Passkey) – Allows passwordless sign-in using device-based authentication like fingerprint, face recognition, or a secure PIN.
Account status
Active user - this option allows you to disable users without permanently deleting their account. If users are not active, they will not be able to log in.
Email verified - this toggle shows you if the user's email address is verified or not.
Account actions
Federated only - This setting requires users to log in using only their federation credentials, they will not have the option to use a username and password.
Requires email verification - This option requires the user to verify their email address on their first login. They will be sent an email containing a link, they need to click the link to confirm we have the correct email address.
MFA required - Multi-factor authentication (MFA) is a security feature that requires users to provide two or more forms of identification before they can access their account.
Send welcome email - To send welcome email to user on account creation to setup password.
Login url - Defines the URL where the user will be redirected after completing their account setup and password creation from the welcome email
Creating a single user
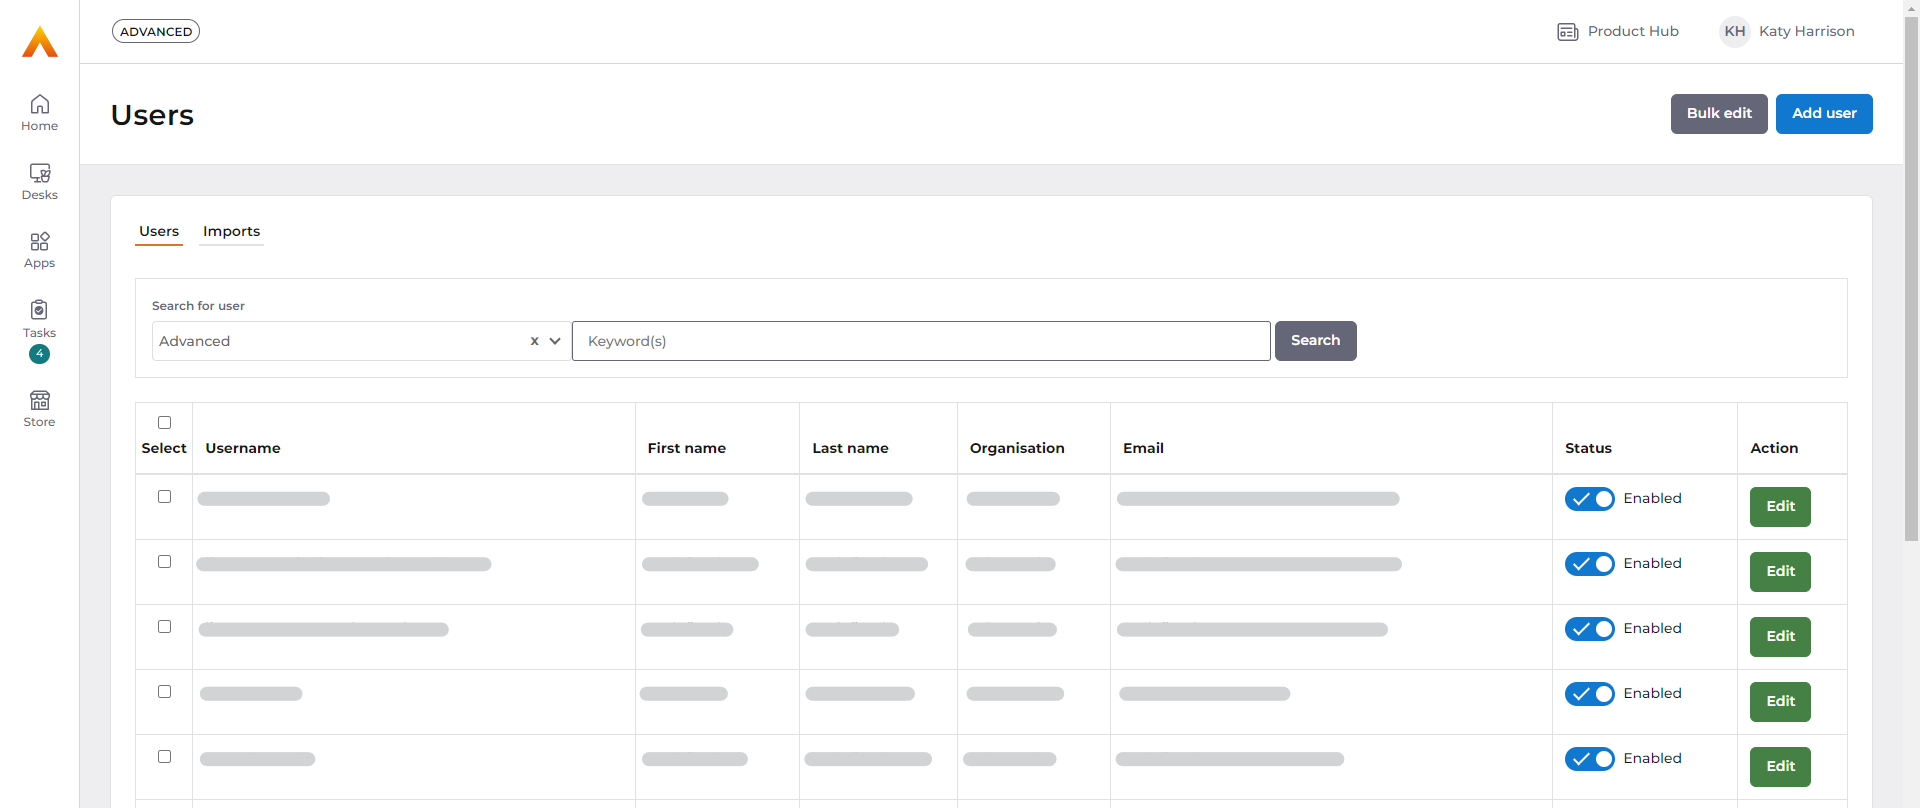
Head to the Users page in MyWorkplace, within Apps on the left menu.
Click the 'Add user' button at the top right.
Complete the required fields. Mandatory fields include First name, Last name, Email address, and Username. The username will populate with the email address but can be manually edited.
Once you have created the user, you can then edit their group membership and permissions.
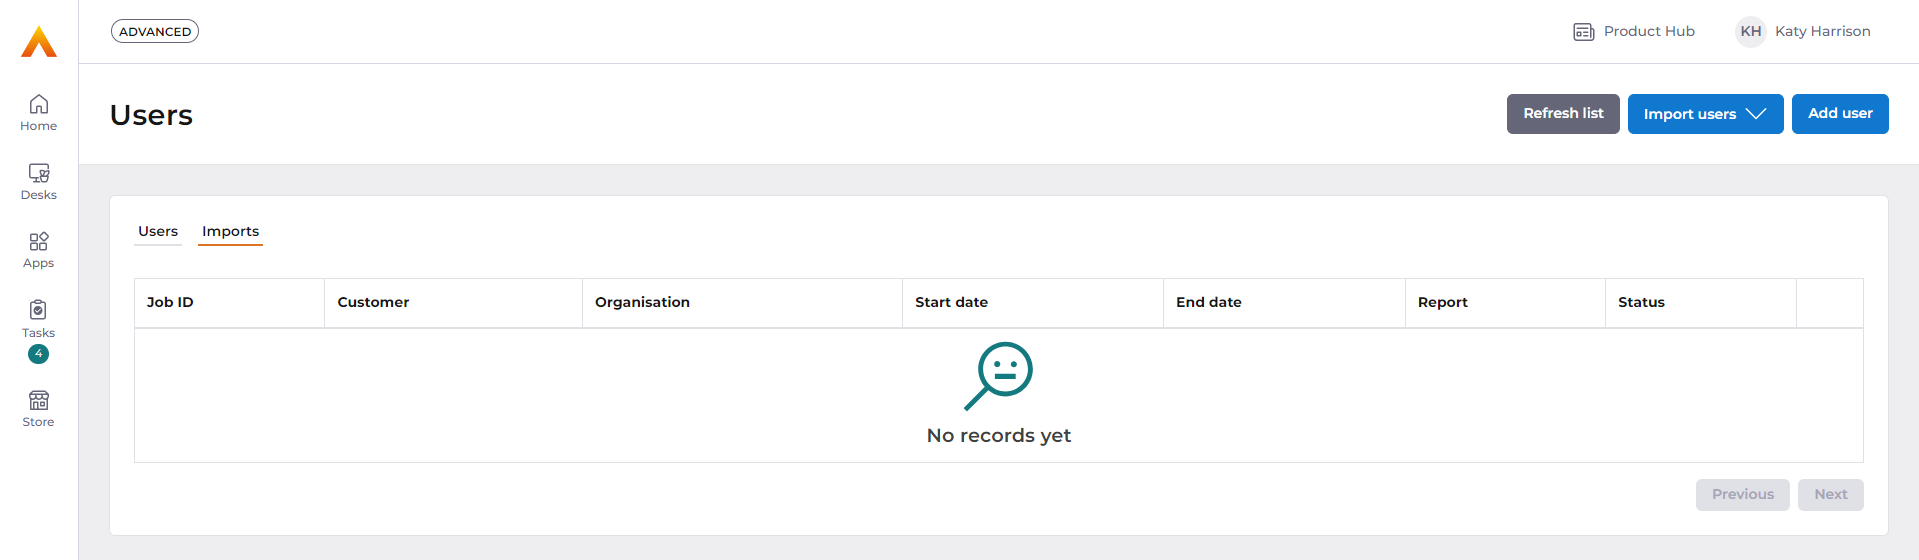
Creating/editing multiple users
Head to the Users page in MyWorkplace, within Apps on the left menu.
Click on the Imports tab.
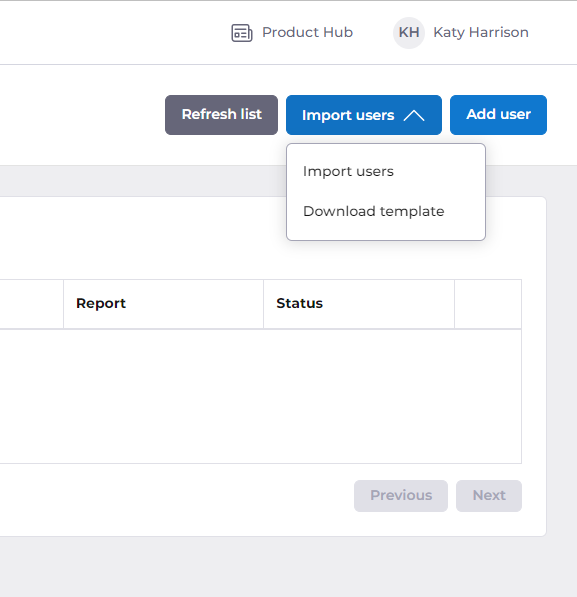
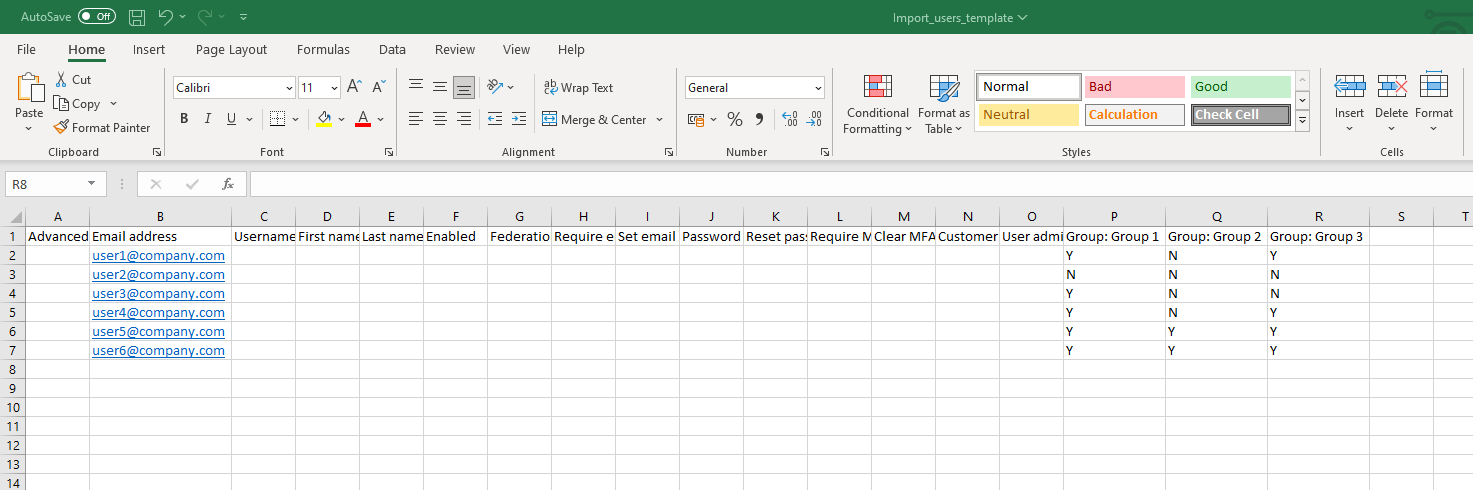
At the top right, click on the Import users dropdown, then Download template. This will download a csv file.
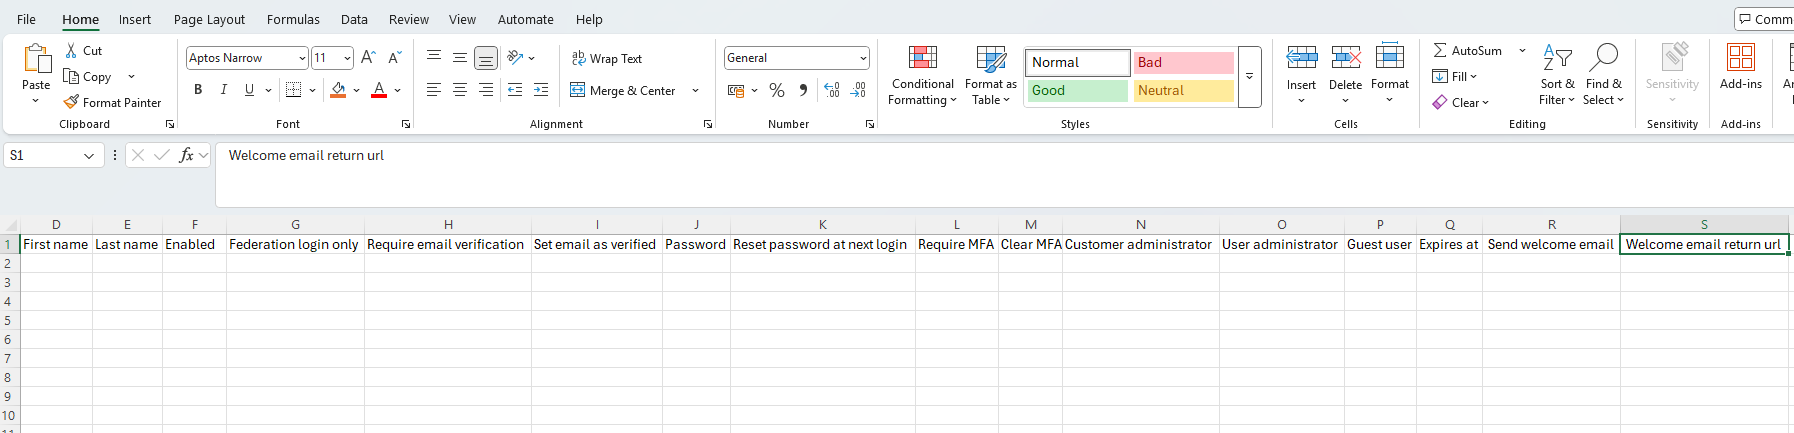
Add the users' details into the rows of the csv file. Complete the Email address, Username, First name columns at a minimum.
Valid values for columns F-I and K-O are Y / Yes / True or N / No / False.
Where columns F-O are left blank, default values as follows will be used:
Enabled: True
Requires MFA: False
Requires email verification: False
Set email as verified: False
Reset password at next login: False
If 'Set email as verified' is set to True, then 'Requires email verification' will always be set to false. Reset password at next login will always be true for new users.
If 'Send welcome email' is set to 'True', then the URL that the customer administrator set on their settings page will be applied across all users when they try to click the Login button on their email or while going through the login process.
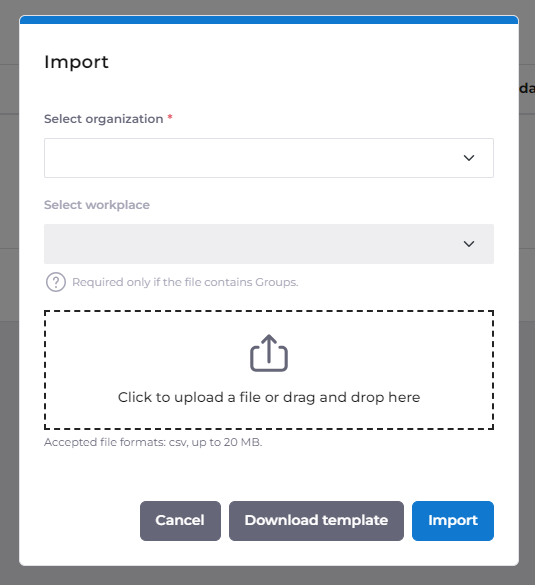
Go back to MyWorkplace. On the Import users dropdown, select Import users.
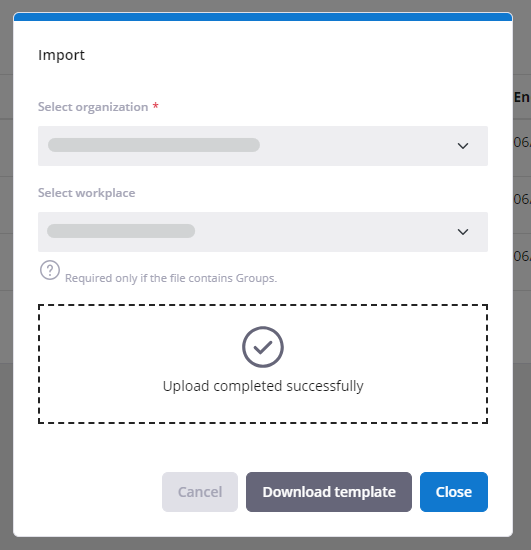
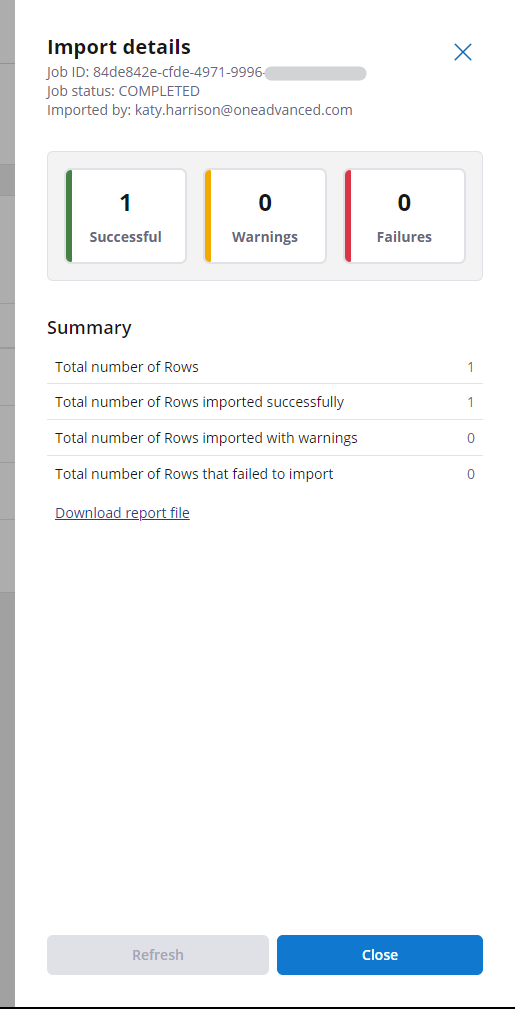
Select the organisation and workplace. In most cases, there will only be one organisation and workplace to choose from. Add the file, then select Import. Once the file has uploaded you will see a message saying Upload completed successfully. This may take a few seconds. You can close this window.
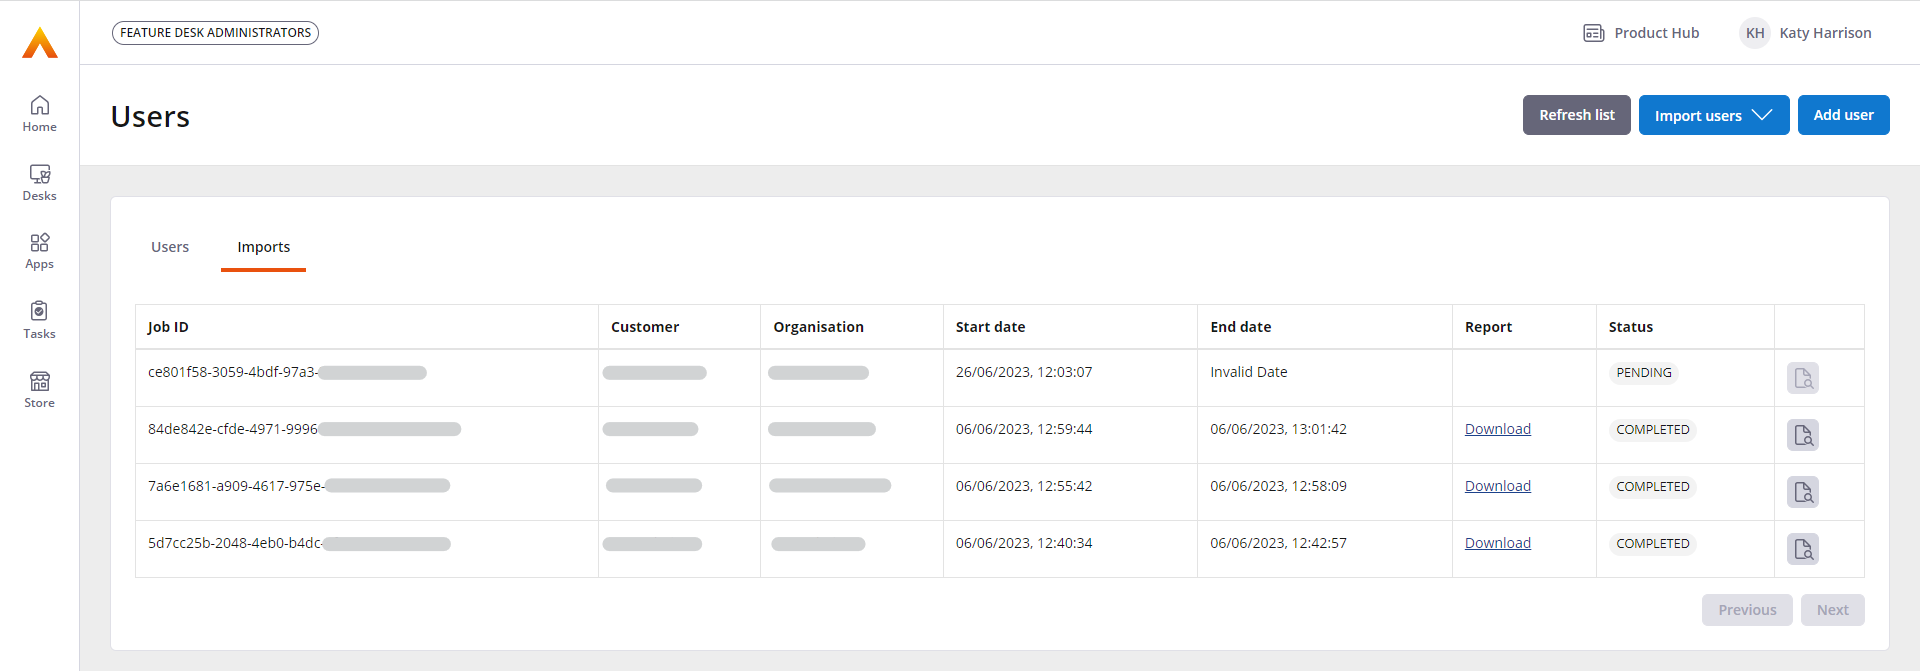
The import will then show on the Imports page as pending. Depending on the number of users in the file, the import might take a few minutes to process. Once the import is complete, the status will show as completed. Click Refresh list to check if your import has finished processing.You can see the details of any previous imports by clicking on the view file button on the right. You can also download a copy of the report file.
Managing a single user
You can update the details and settings for a user by selecting Edit on the Users page for the relevant user.
You can then make changes to the user details, such as name, username, and email address. You can manage the user's authentication settings, such as resetting their password or MFA. You can manage their paired accounts, group membership and permissions from the respective tabs.
Managing multiple users
Bulk edit
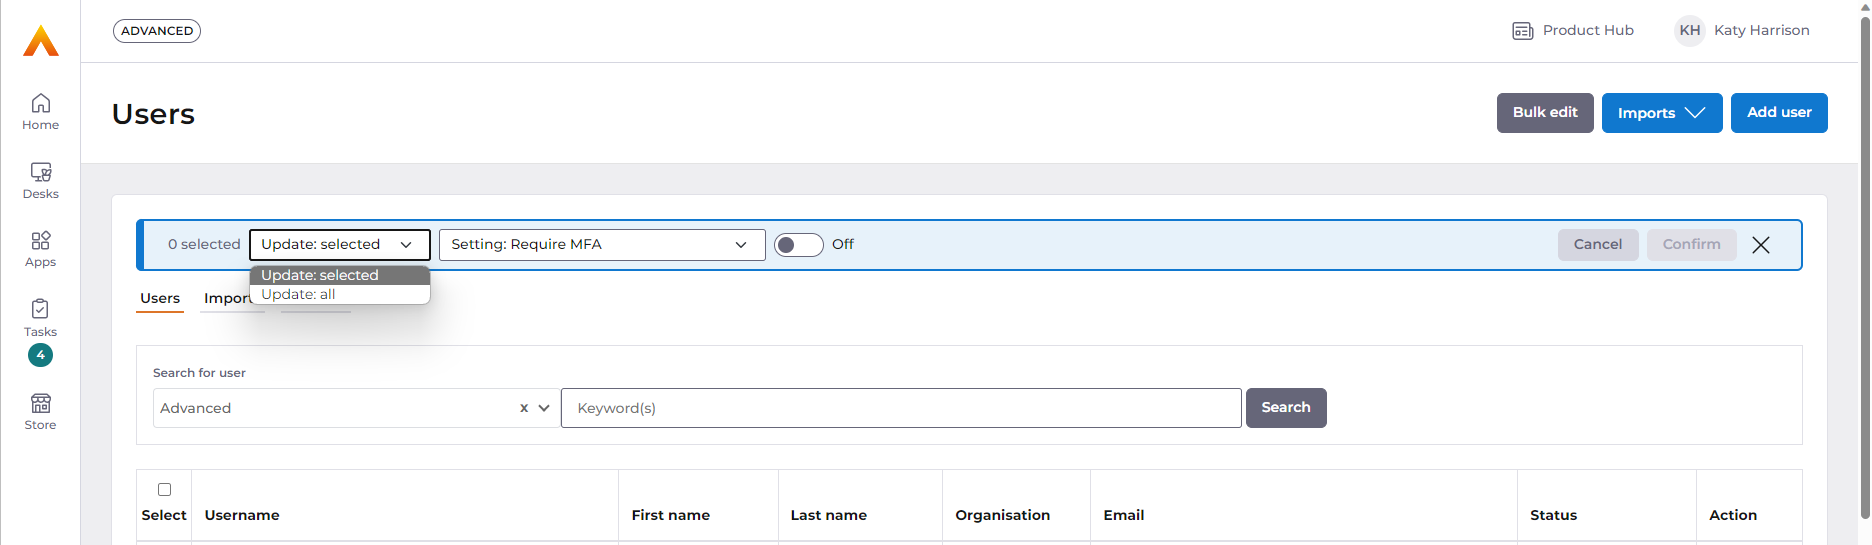
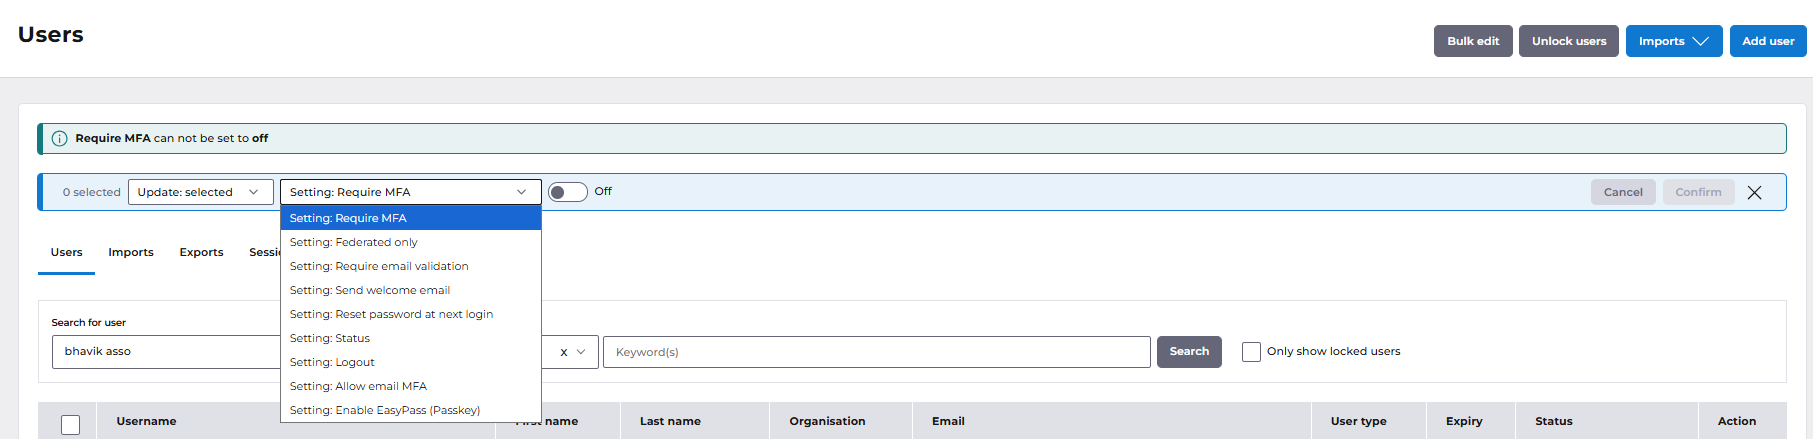
You can use the Bulk edit option to update some settings for multiple users at once.
Click Bulk edit on the Users page.
Choose whether you want to update the setting for selected users or all users. If you choose selected, you will need to check the box in the 'Select' column for the relevant users.
Choose which setting you want to update.
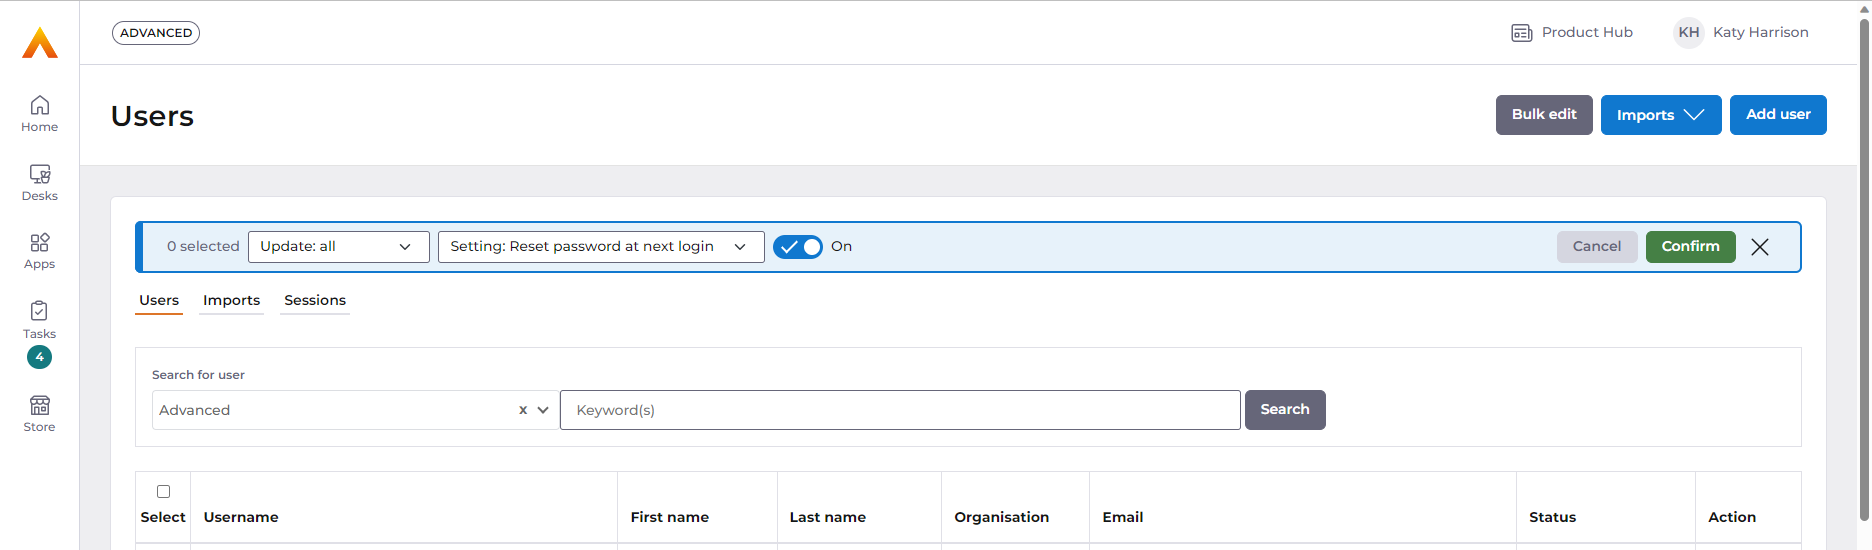
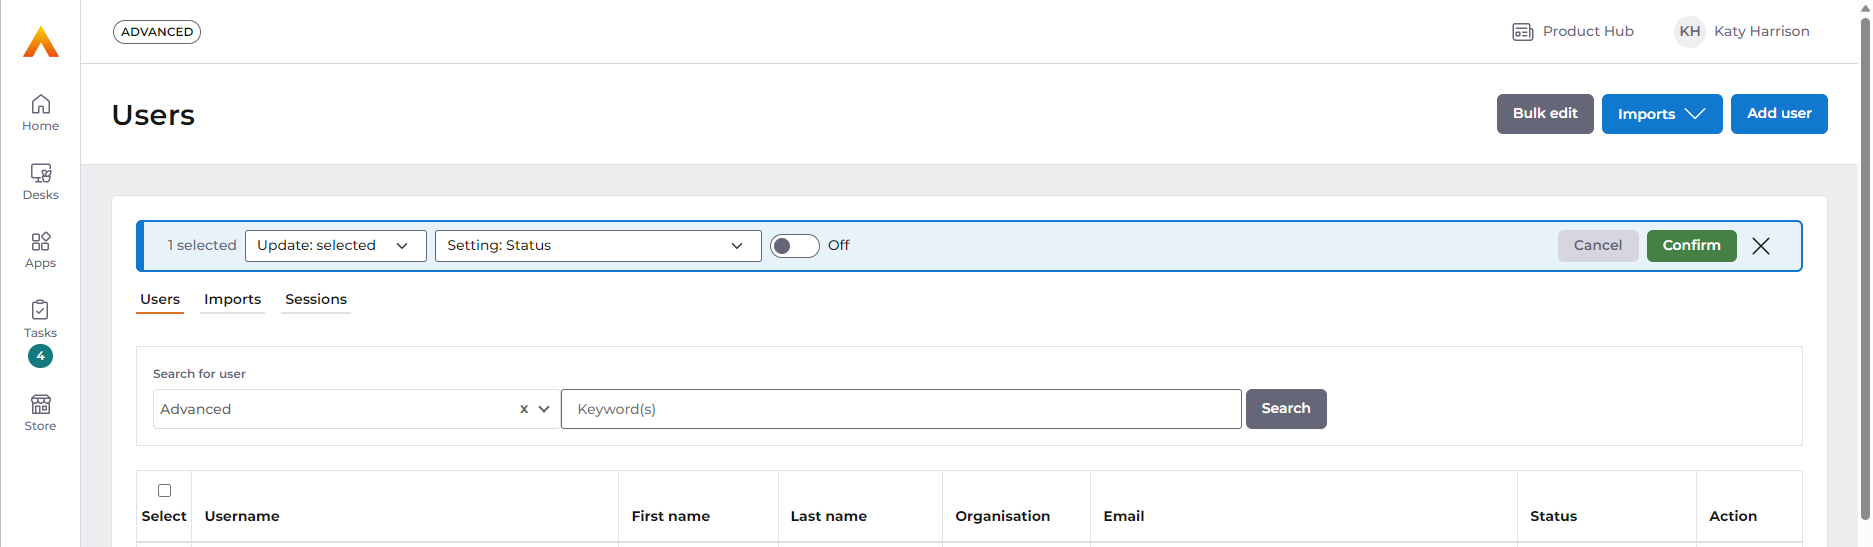
Use the toggle to set whether you want the setting to be on or off. For example, these options would update all users to reset their password at next login:These options would update only the selected users to disable their accounts:
User import
You can also use the User Import functionality to manage user details and group membership in bulk. When you import the file, the system will check the email addresses against existing users and if they already exist, update their details.
To do this, follow the same steps as for creating multiple users by adding user details into the import template. If you are updating existing users, you only need to complete the email address column and any columns where you are making changes.
Enter Y / Yes / True or N / No / False into the rows for each user. If you leave any cells blank for a user, no change will be made to their settings for that option.
Managing group membership for multiple users
To manage group membership, add the group names into the column headers of the file, from column P, in the format Group: [group name].
Enter Y / Yes / True or N / No / False into the rows for whether each user will have access to the groups. If you leave the cell blank for a user, no change will be made to their existing membership of that group.