Data Platform (Bring Your Own BI/Data Share) - Snowflake ODBC Connector Configuration Guide

This guide provides the steps required by a customer of OneAdvanced Data Platform (Bring Your Own BI and Data Share) to configure aspects of their local environment to be able to connect a BI or data query tool to Snowflake.
Prior to reading this guide, please make sure you’re familiar with the content of the Data Platform (Bring Your Own BI and Data Share) Connection Options guide.
Install and Set-Up Snowflake ODBC Connector
This section applies to any use-case covered in the Data Platform (Bring Your Own BI and Data Share) Connection Options guide that describes the need to install and configure the Snowflake ODBC Connector
- On each PC/server requiring access to Snowflake, download and install the Snowflake ODBC Connector using this link - https://docs.snowflake.com/en/developer-guide/odbc/odbcOneAdvanced is also aware of third-party Snowflake ODBC drivers. Only the official Snowflake supplied driver is supported by OneAdvanced.
- Launch the Windows Data Source Administration Tool:
Search on your Windows machine for the launcher for the ODBC Data Sources (64-bit) Administration Tool:
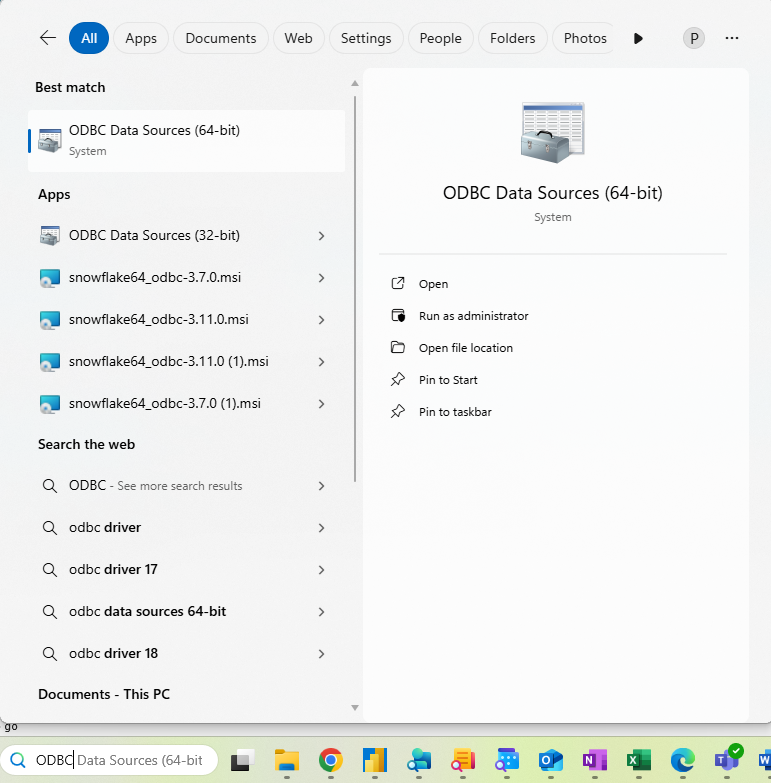
Once you find the ODBC administration tool, click on the tool to launch it and display the set-up window.
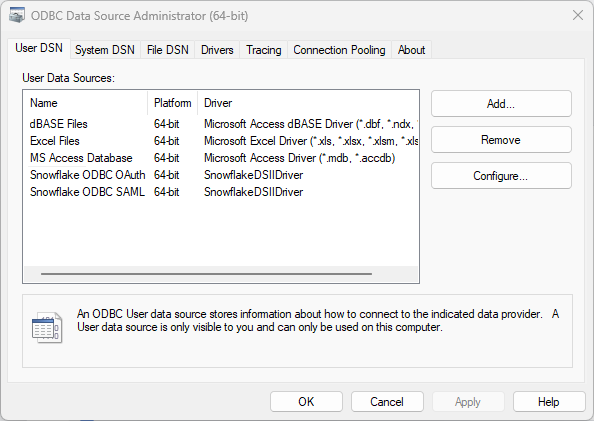
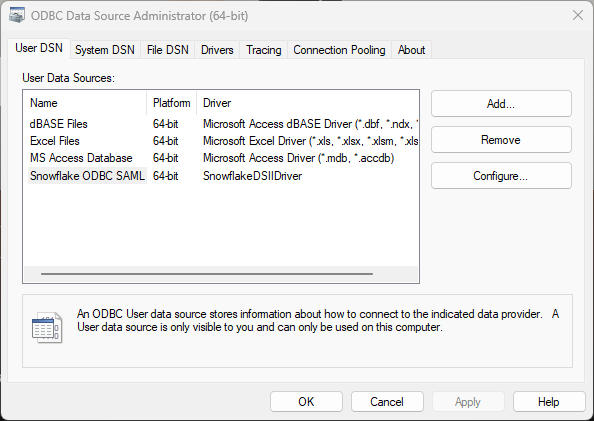
- Verify that the Snowflake ODBC driver is installed:
Navigate to the Drivers tab in the set-up window and verify that the driver (SnowflakeDSIIDriver) appears:
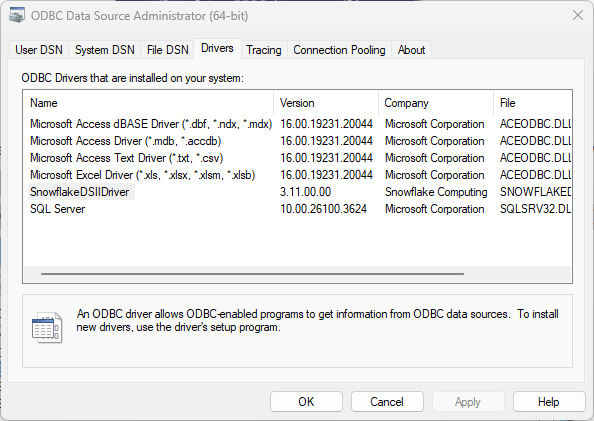
If you do not see SnowflakeDSIIDriver, then the Snowflake ODBC driver installation did not complete successfully and you will need to re-install it.
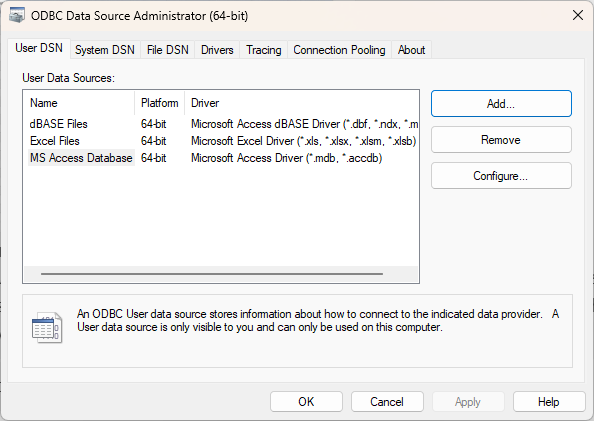
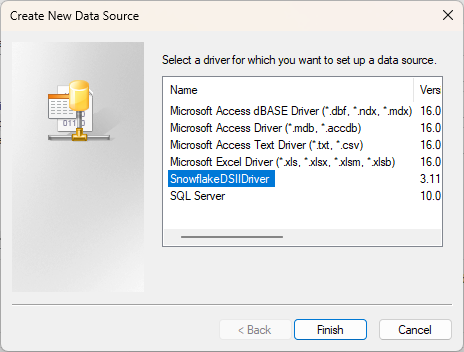
- Create a new DSN:
- Click on the User DSN or System DSN tab and click the Add button:
- Select SnowflakeDSIIDriver then click Finish.
- Click on the User DSN or System DSN tab and click the Add button:
Configure the Snowflake ODBC Connector with SAML
This section applies to any use-case covered in the Data Platform (Bring Your Own BI and Data Share) Connection Options guide that recommends ODBC with SAML.
- Complete the Snowflake Configuration Dialog fields as below:
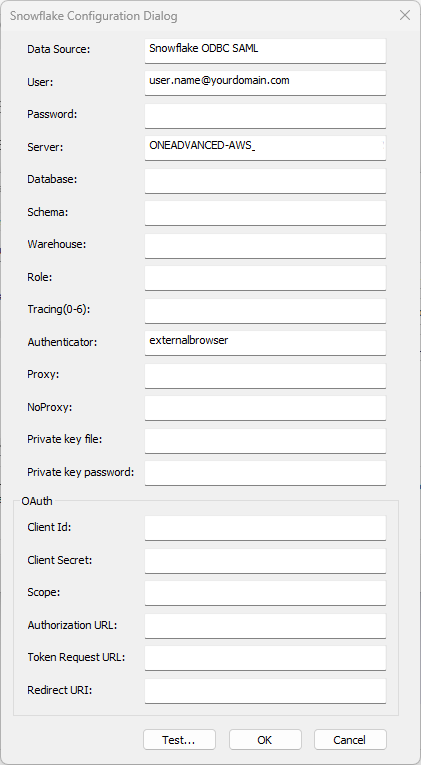
User: The user’s username as licensed in OneAdvanced Identity (no password is required).
Server: This will be provided to you by OneAdvanced.
Authenticator: externalbrowser
- Click the Test… button
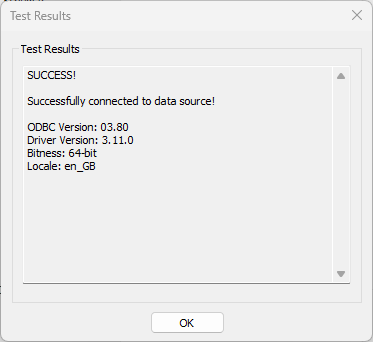
If a ‘FAILED!’ test occurs, double-check the entered values ensuring there are no trailing spaces, otherwise, contact OneAdvanced support.
After receiving a ‘SUCCESS!’ result, click OK.
- Click OK to save the Data Source.
Configure the Snowflake ODBC Connector with OAuth (Client Credentials Flow)
This section applies to any use-case covered in the Data Platform (Bring Your Own BI and Data Share) Connection Options guide that recommends ODBC with OAuth.
OAuth will be configured to use ‘Client Credentials’ requiring non-user specific credentials to be maintained within the ODBC DSN. For this reason, this method should only be used within a secure environment. It is the customer's responsibility to secure any authorisation secrets referred to below.
Pre-requisites
- Follow the steps in this guide to create a client credentials API Client admin app https://myworkplace.helpdocs.io/article/5p1xb6vo5v-api-clients
- Client Id
- Client Secret (never share this with anyone, especially over email etc)
- Token Request URL
- Follow the steps in this guide to add a scope and assign it to the API just created
https://myworkplace.helpdocs.io/article/le9obx211i-creating-and-managing-custom-scopes
- Send the CLIENT ID only to your OneAdvanced contact assisting you. Currently, OneAdvanced must authorise the CLIENT ID to be used with your data in Snowflake. This will take 1-2 days after receipt of your CLIENT ID.
Create Snowflake ODBC DSN
- Complete the Snowflake Configuration Dialog fields as below:
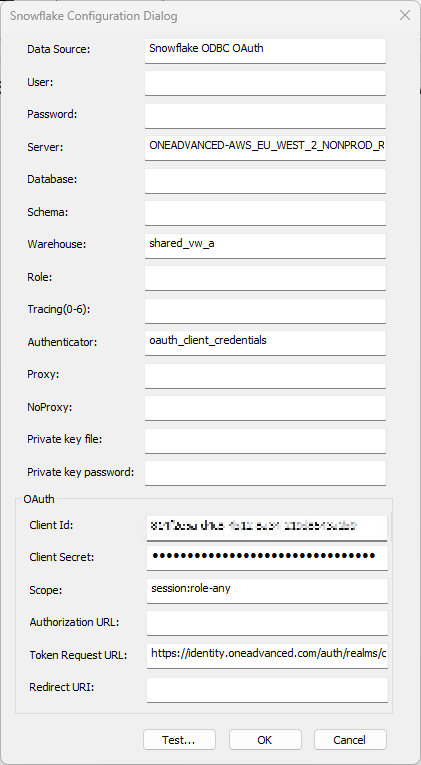
Server: This will be provided to you by OneAdvanced.
Warehouse: shared_vw_a
Authenticator: oauth_client_credentials
Client Id: As noted during the client credentials API Client set-up
Client Secret: As noted during the client credentials API Client set-up
Scope: session:role-any
Token Request URL: As noted during the client credentials API Client set-up
- Click the Test… button

If a ‘FAILED!’ test occurs, double-check the entered values ensuring there are no trailing spaces, otherwise, contact OneAdvanced support.
After receiving a ‘SUCCESS!’ result, click OK.
- Click OK to save the Data Source.